Create A Workflow
Creating workflows in Changeset is how you automate code review tasks, and connect code review events to actions. The workflow creator allows you to essentially create a code review "robot" that can do things like welcome new contributors with a warm comment, or automatically merge a review that meets a specific criteria.
Clicking "New Workflow" from a repository overview will take you to the workflow creator
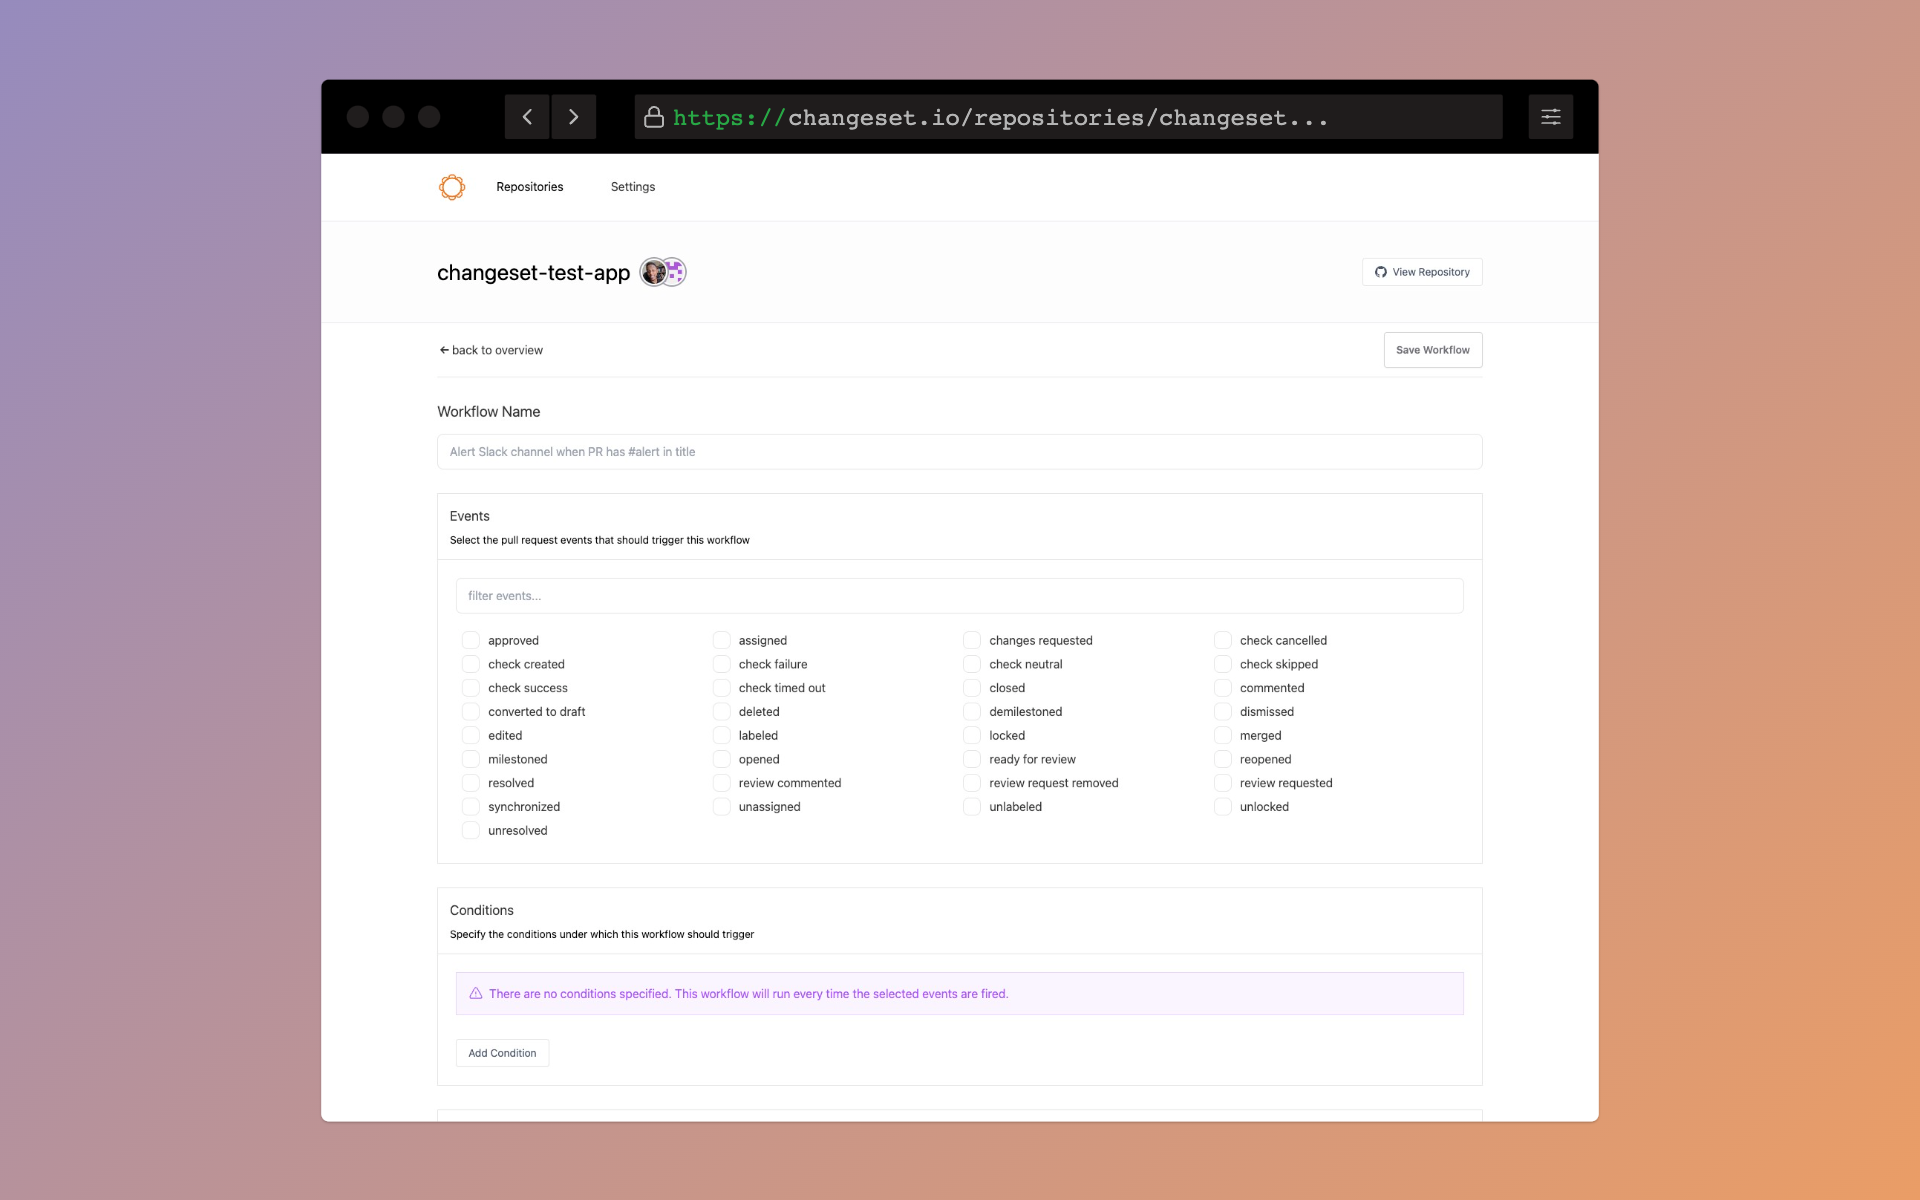
Workflow Name
The workflow name is simply the display name, but it is a required field. It helps to give the workflow a descriptive name that hints at what it does. As a simple example, this workflow will leave a comment any time the title of a code review contains the word bug. A name like "Comment when a title contains 'bug'" might make sense.

Workflow Events
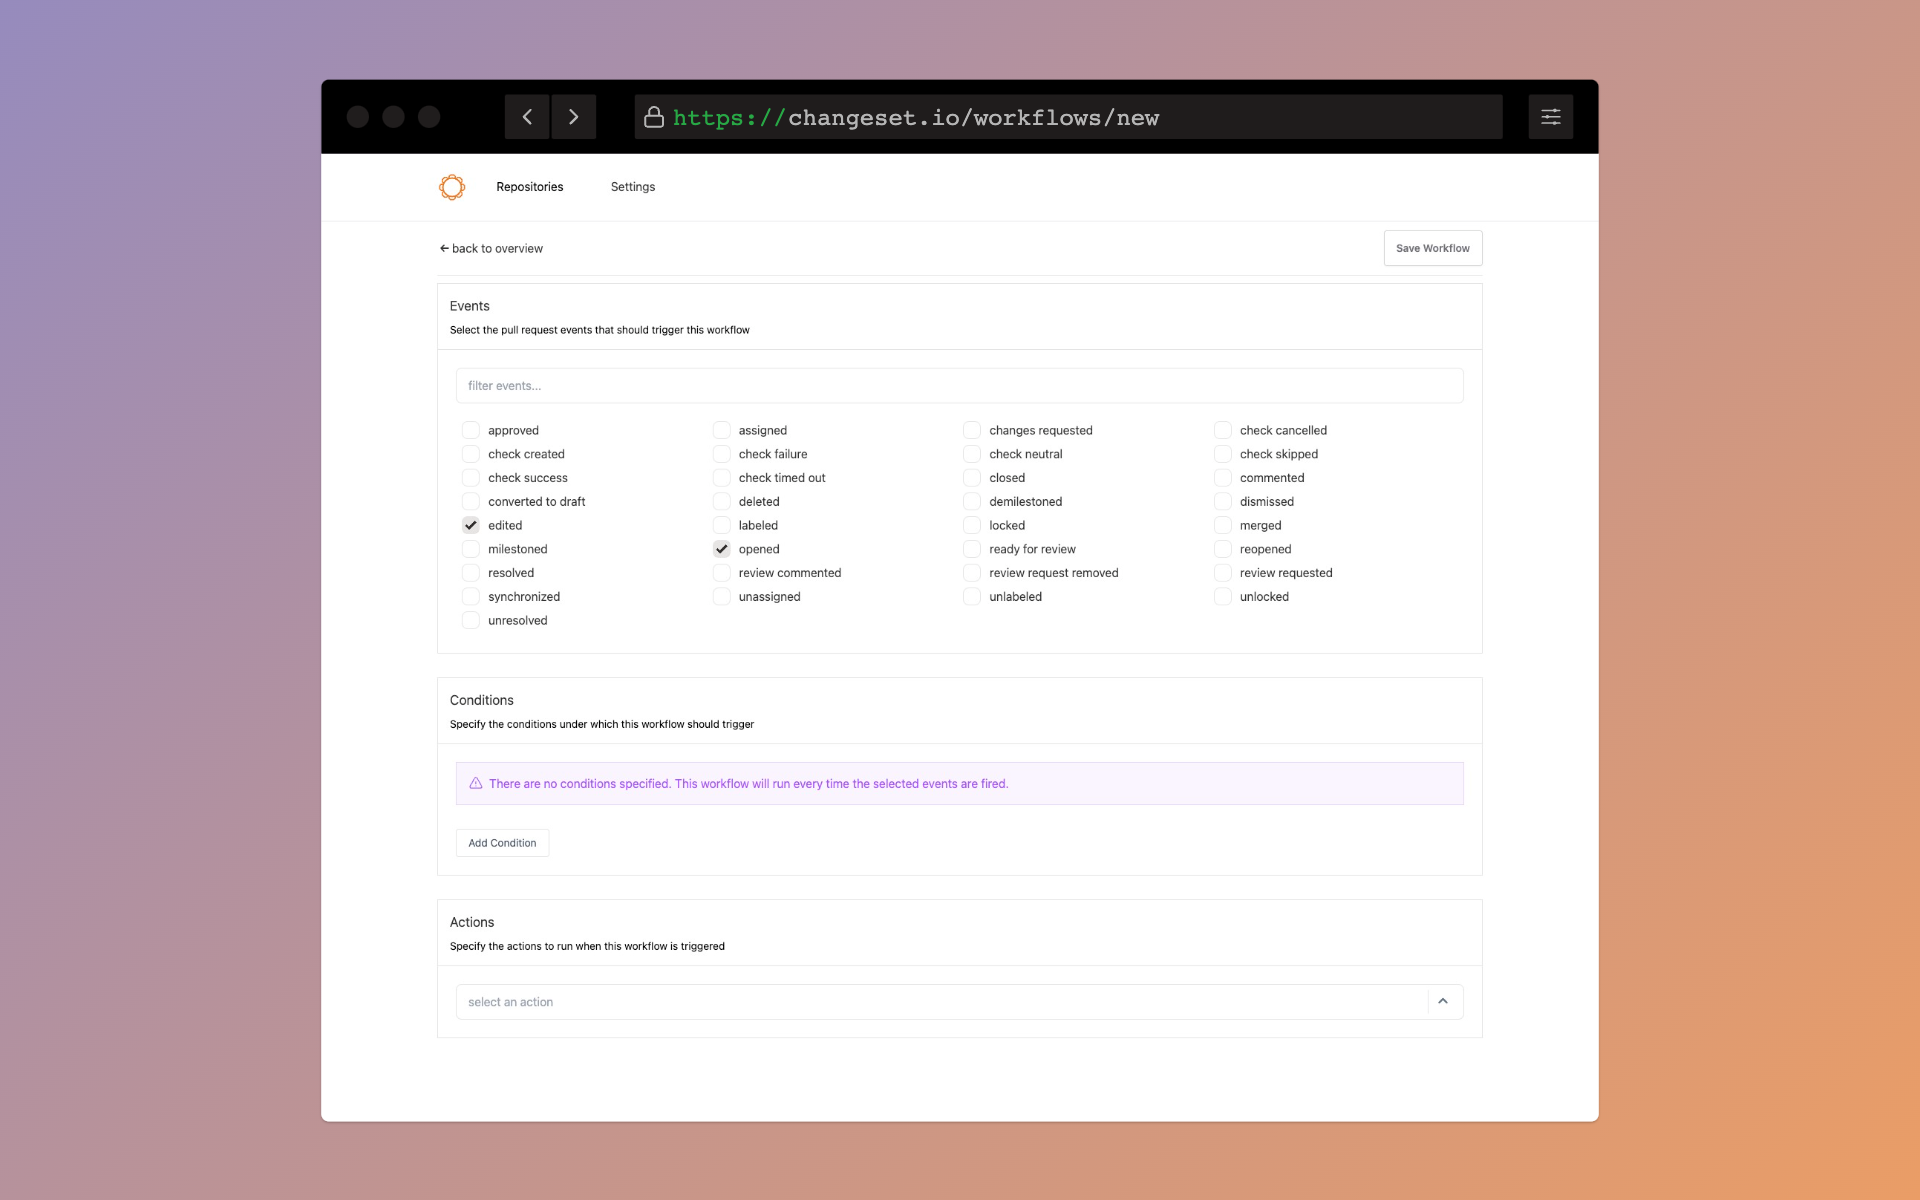
The events correspond to things that are happening in your repository that you want this workflow to listen to. There are many events to choose from, and the events reference digs deeper into each one. Use the input to filter the list down if you already know which events you're looking for.
The simple workflow in this example only needs to run when two events occur:
opened: When a pull request is opened by anyone in the repositoryedited: When a pull request's title or body is updated
Custom Attributes
Sometimes a workflow requires looking at a specific file in a pull request, or modify one of the default attributes to better fit your needs. You can use custom attributes to apply maps, filters, and functions to achieve this behavior in workflows. The Custom Attribute documentation digs deeper into this functionality.
Conditions
Conditions are used to ensure that a workflow only runs under a specific set of circumstances. For example, You may only want to run a workflow if a specific label is added to a code review, or when no one has been assigned as a reviewer. You could also not specify any conditions, and your workflow will run everytime the selected events fire.

Conditions allow you to craft customized automations to your exact specification. The example workflow will use a condition that checks if the Title attributes includes the word "bug".
Click "Add Condition" to add a new condition.
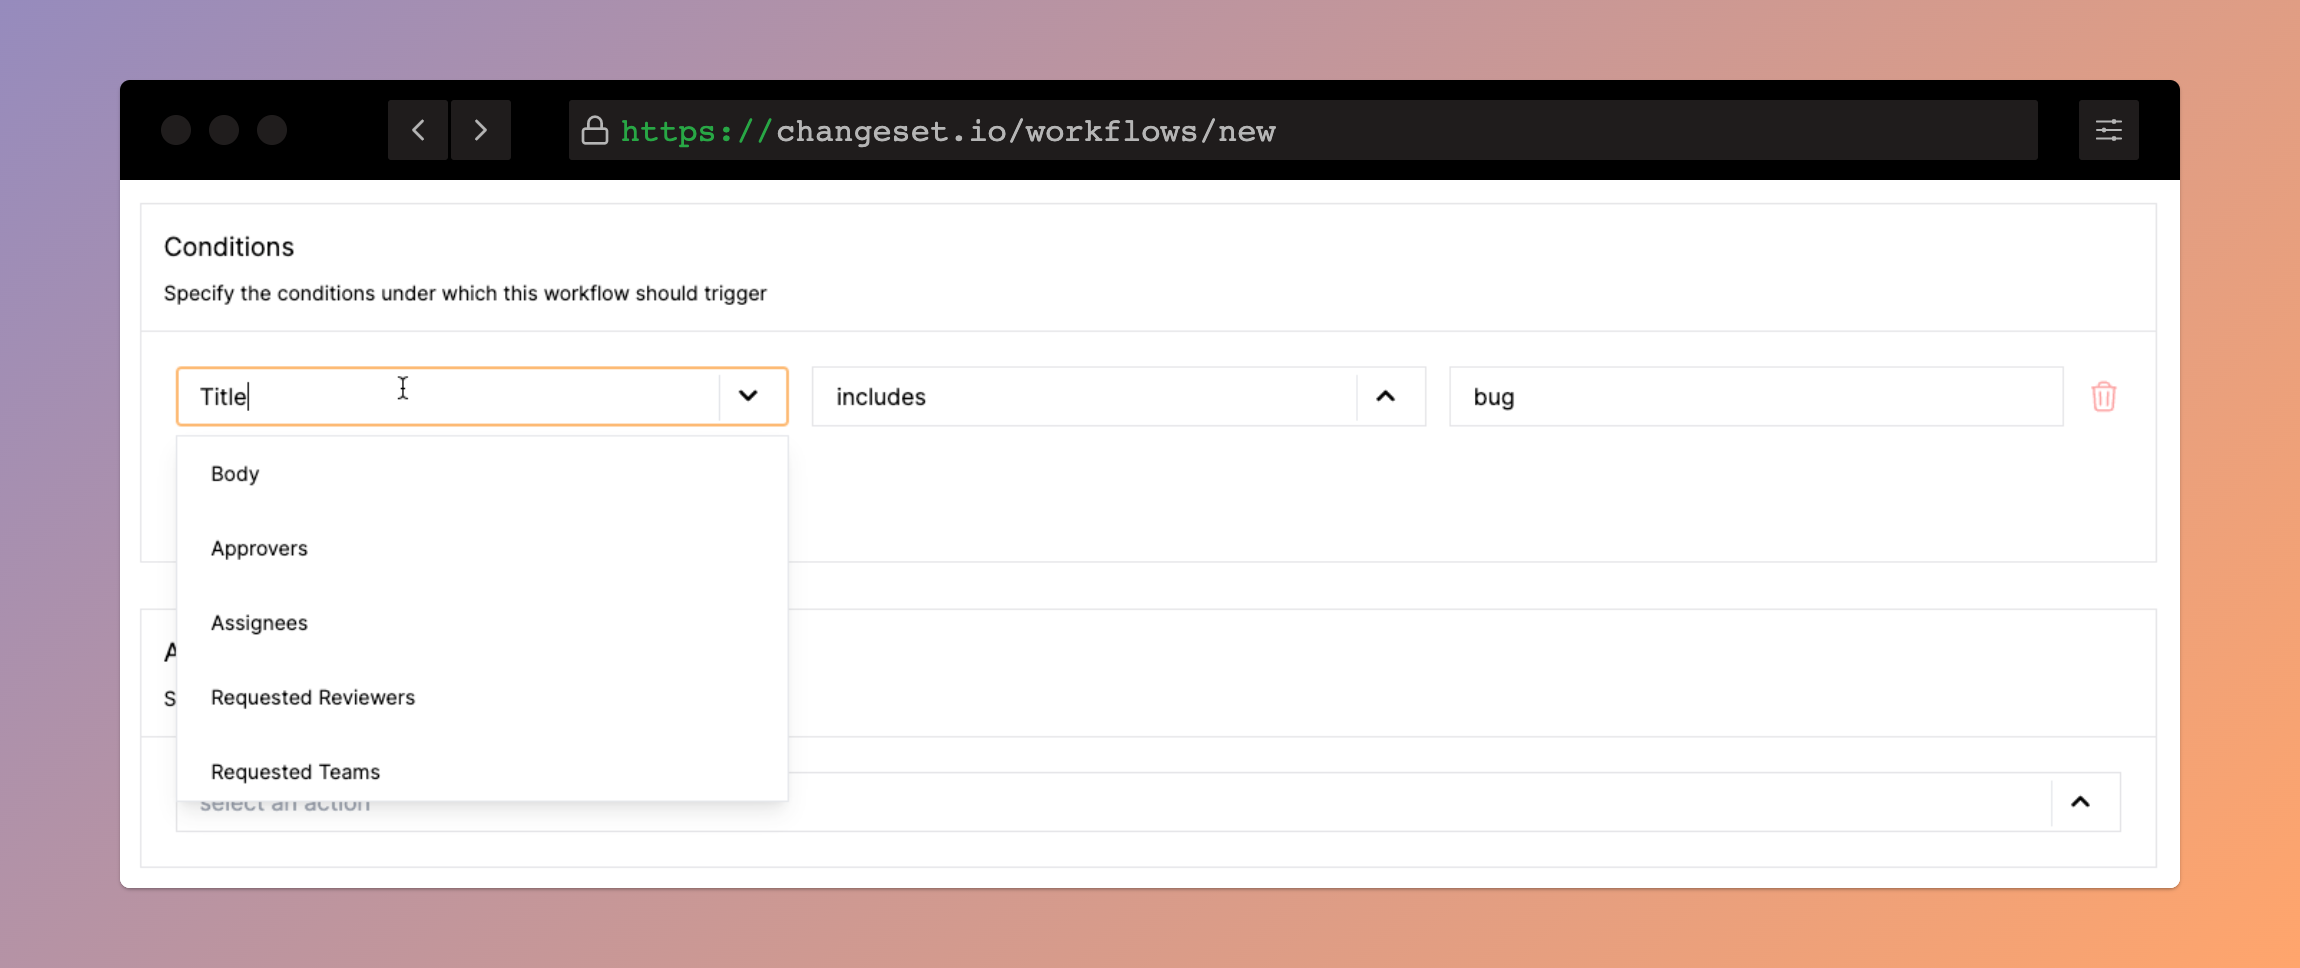
The Title attribute is selected by default, but the dropdown menu shows the other available choices.
The includes operator is selected by default, but depending on which attribute you've selected, other options like equals, is greater than, and is less than may be available
Finally, the value of bug is used in the value input for the condition. Now it basically reads as "IF the title includes the word 'bug'"
Actions
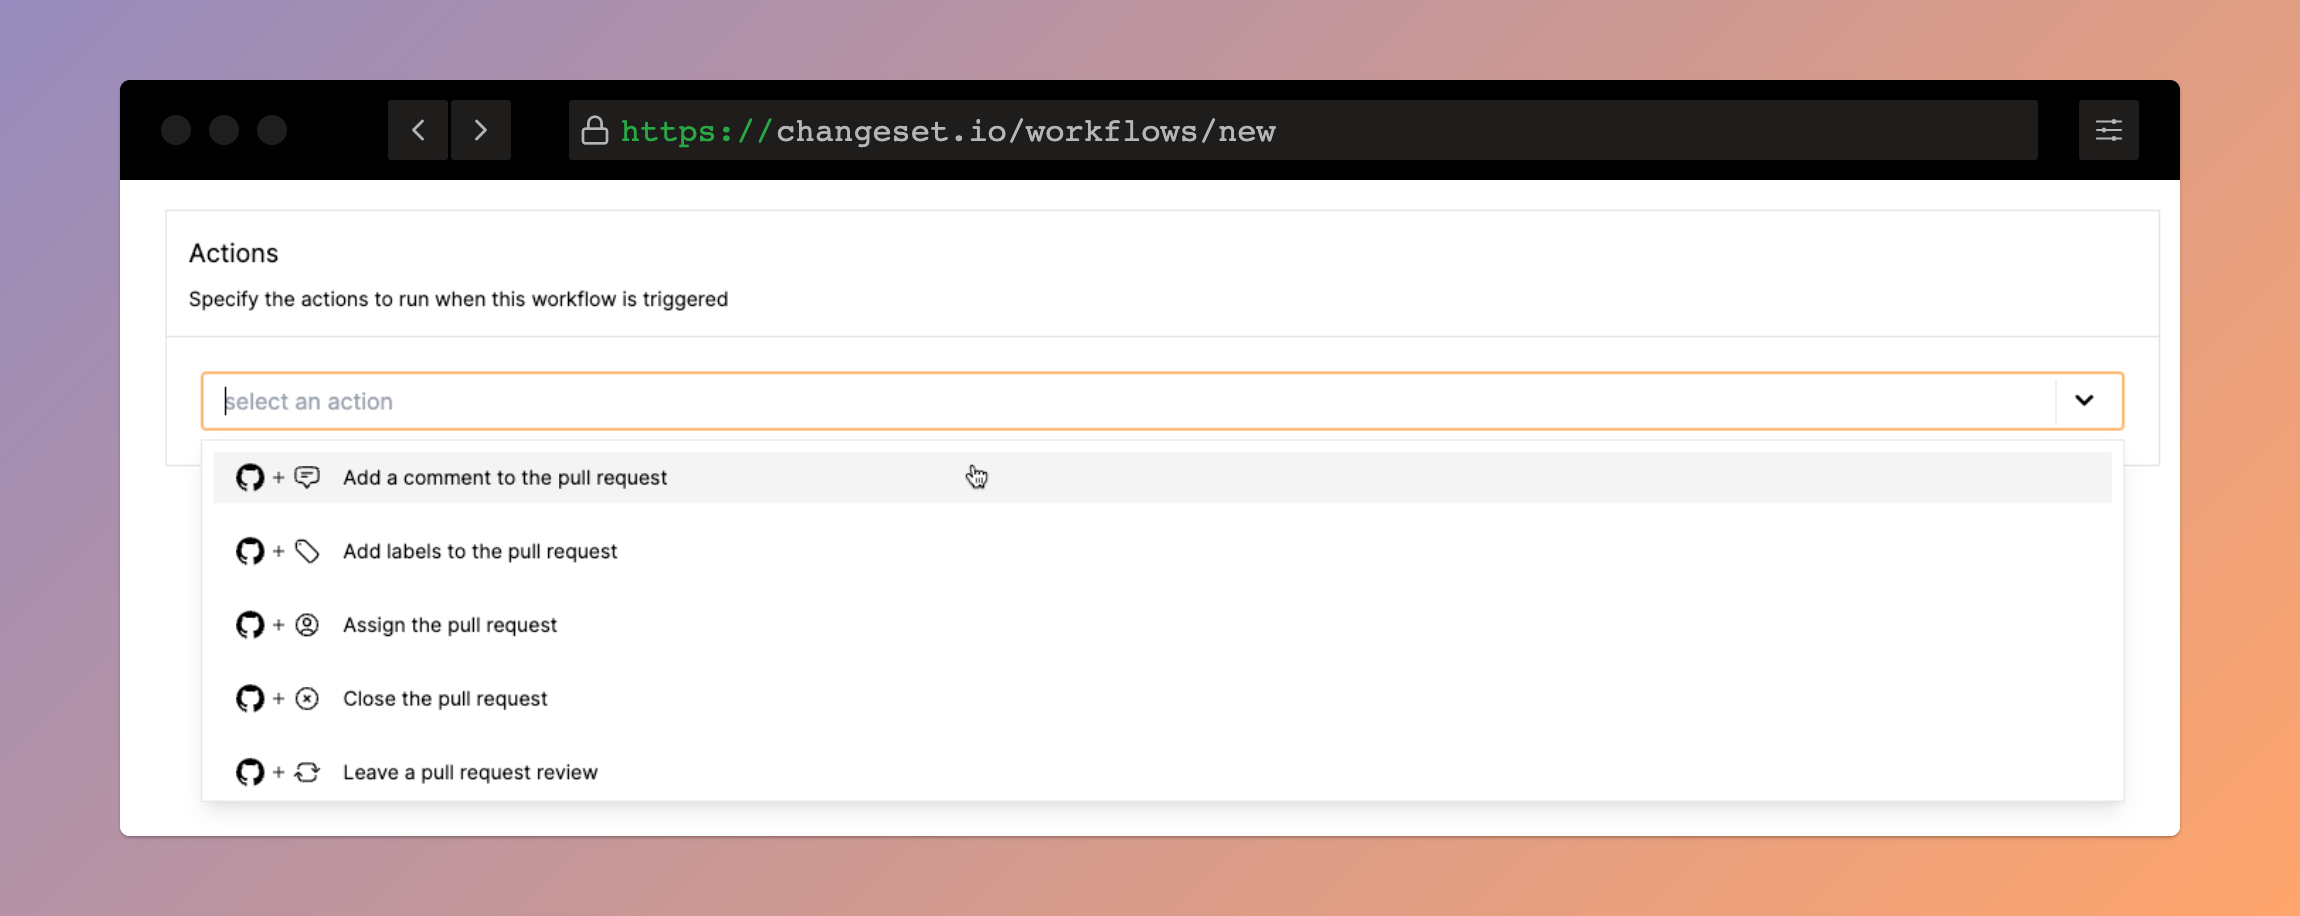
If an event is fired and the specified conditions are met, an Action will occur. Most commonly an action will trigger feedback on a code review like leaving a comment, or adding a label. The actions documentation digs deeper into the available actions.
This example makes use of the "Add a comment to the pull request" action
Action Customization
Most actions have some values that you can customize, such as specifying the markdown to use when adding a comment.
Click edit to customize the options for the selected action.
Here, we've added some markdown for the comment that will be posted when the example workflow is triggered.
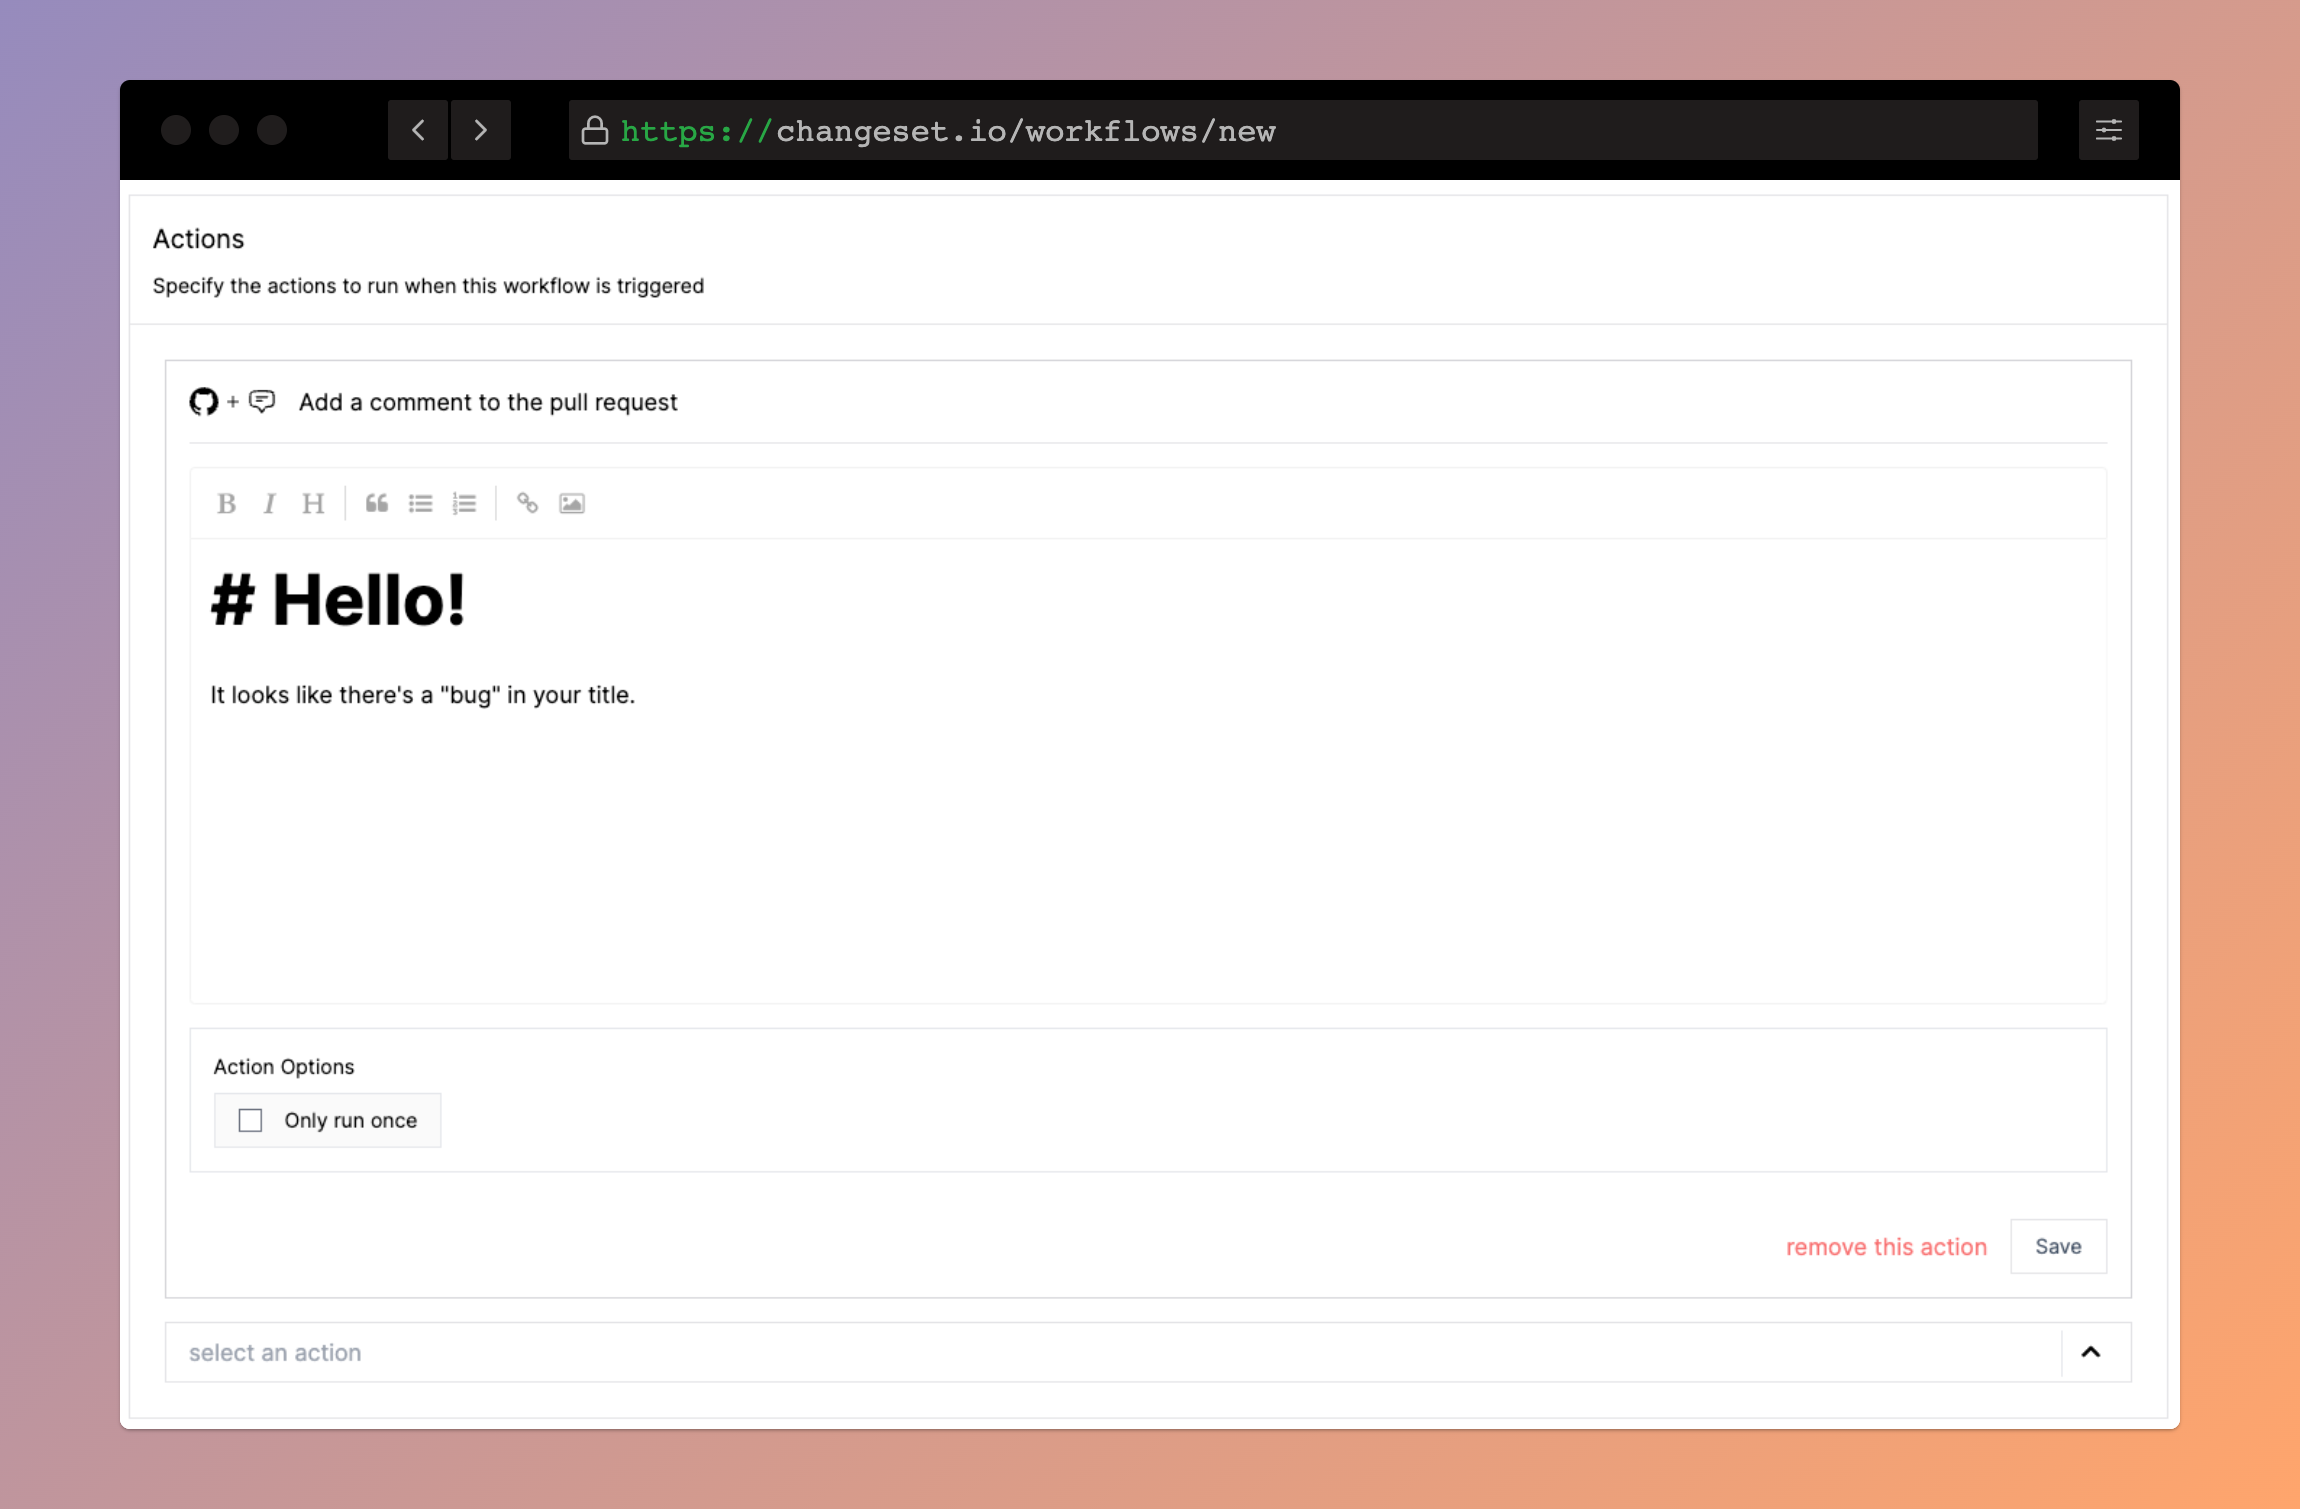
Click Save to finish customizing the action
Save & Test
That's it! Click the Save Workflow button in the top-right to save the workflow and be taken back to the repository overview screen. All that's left is to verify that the workflow is working as intended.
Example Pull Request
Here we're opening a pull request with the title of Update README.md bug. The example workflow runs on the opened event, and checks if the title includes the word bug, so the workflow should run when the Create pull request button is clicked and Changeset is notified of the update
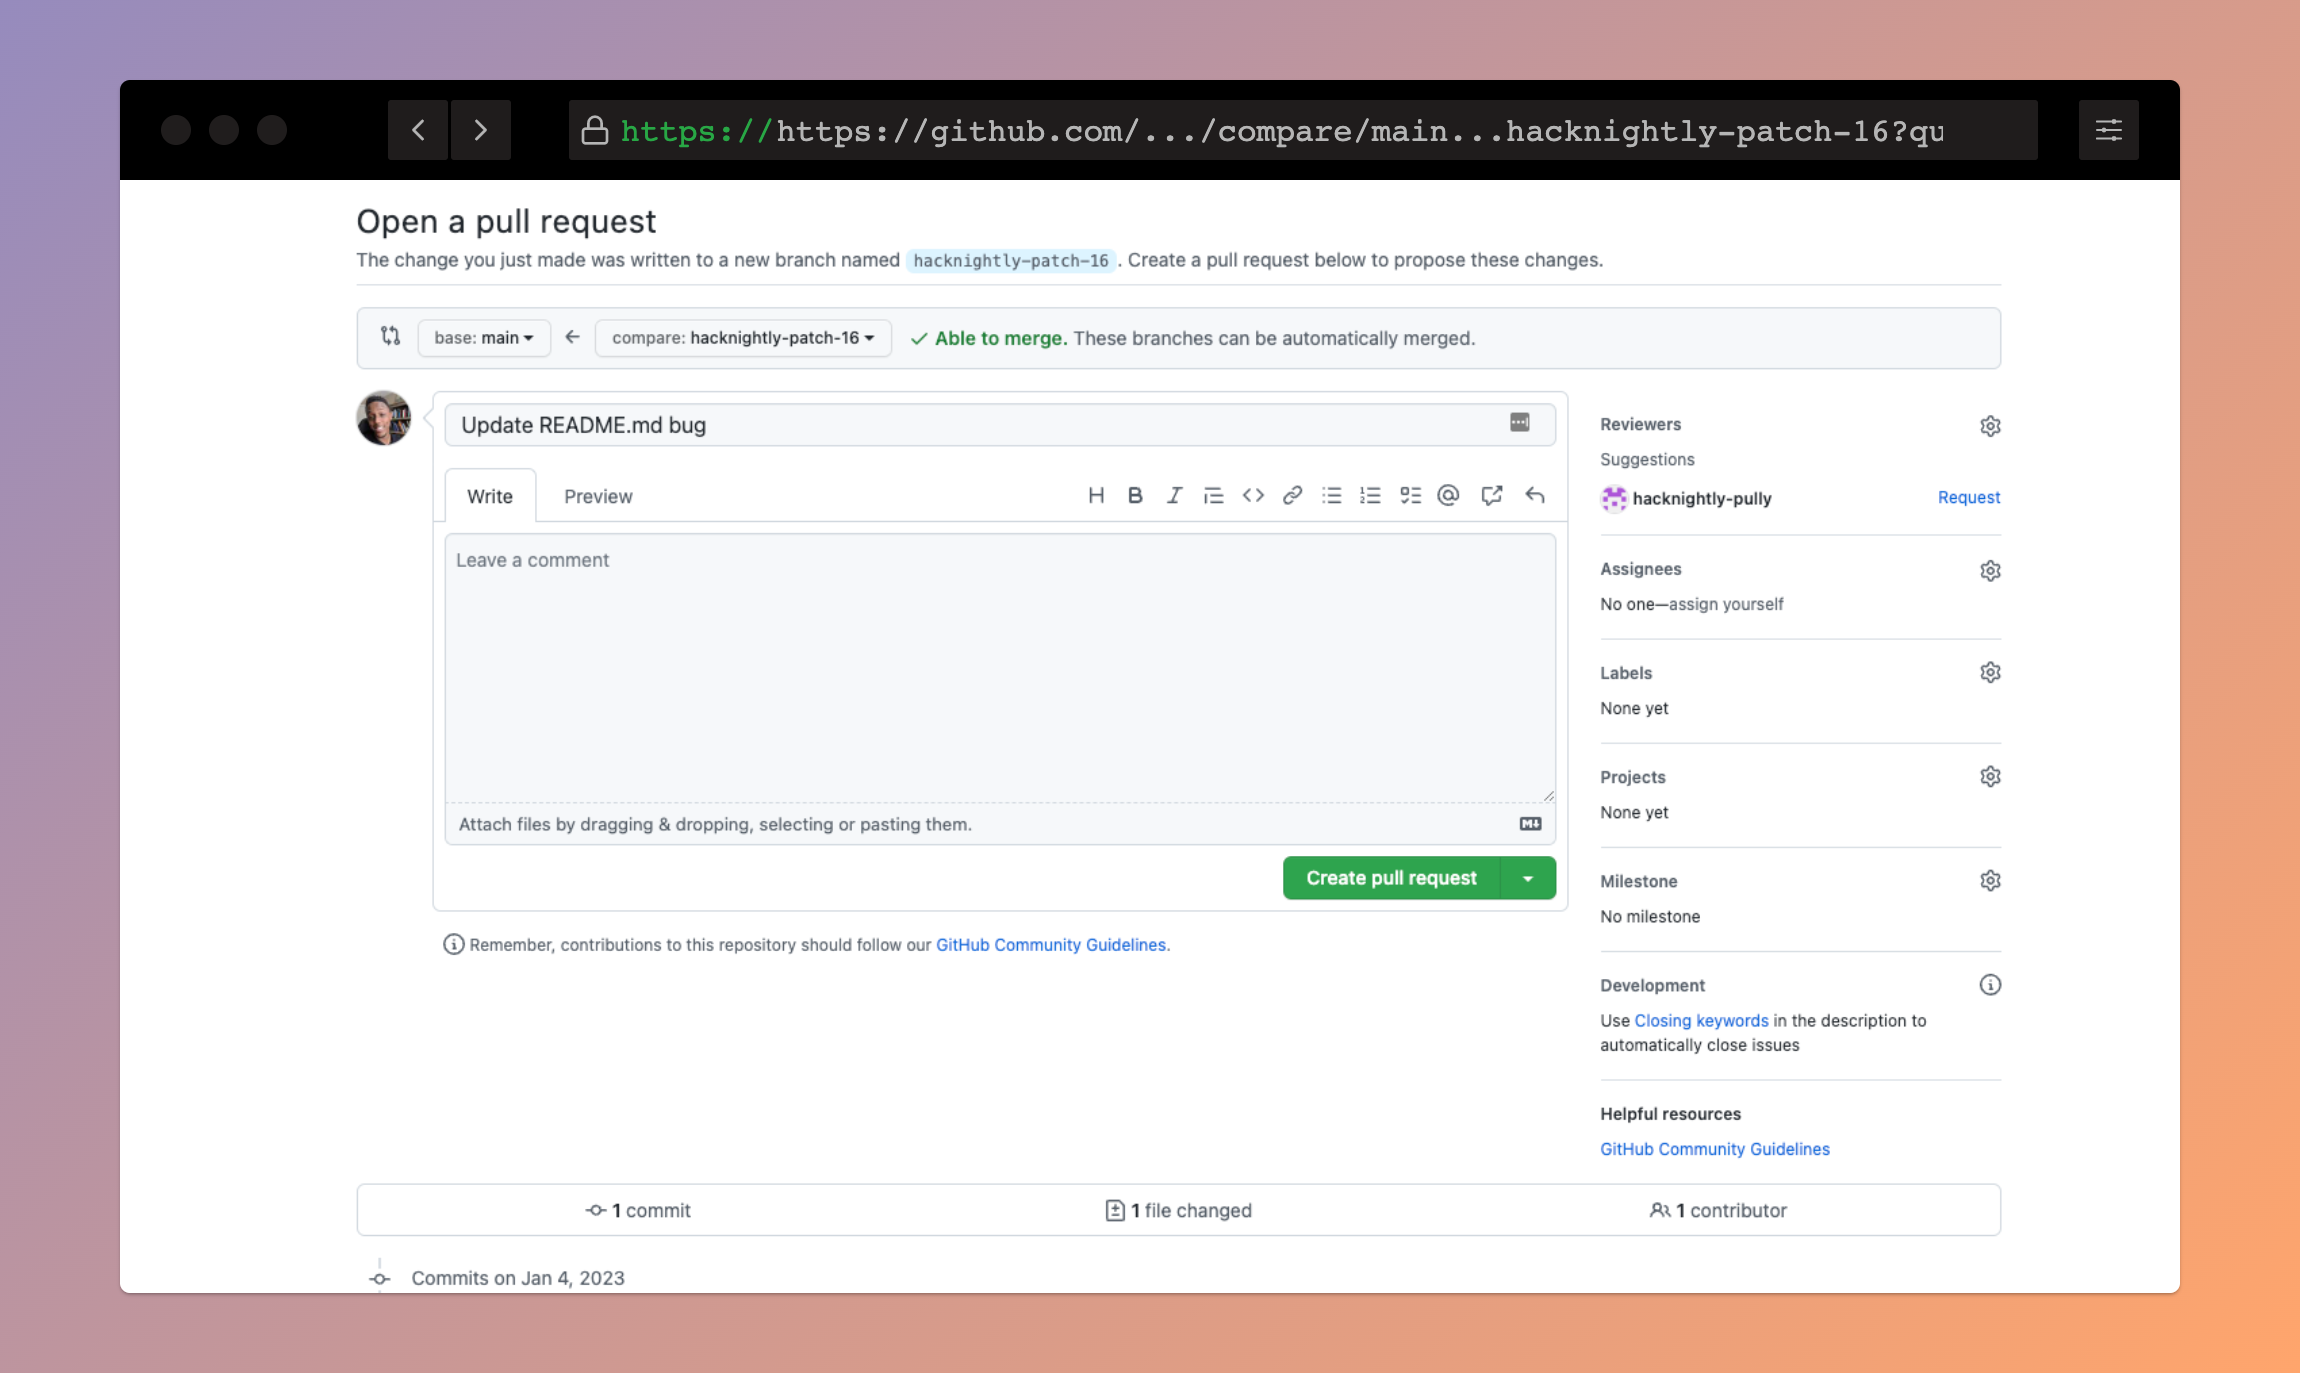
The workflow has ran, tested the conditions, and the comment action from our workflow has added a comment to the pull request informing the user that there's a "bug" in their title

Note: You will not see a picture of my face when Changeset interacts with your pull requests, that's just our test bot, it'll look like this in real life

More On Conditions
Custom Attributes
Custom attributes allow you to modify some attributes by applying filters or functions to lists. As a contrived example, you might want to make sure that no one changes more than 3 javascript files in a pull request. To create this rule, we can customize the files attribute and create a new attribute that represents the number of changed javascript files. This will require 3 modifiers:
- Filter the list down to just javascript files
- Filter the list down to only files that were changed
- Count the results in the list
Start by visiting the "Custom Attributes" link in the repository overview sidebar and click "Create A Custom Attribute"
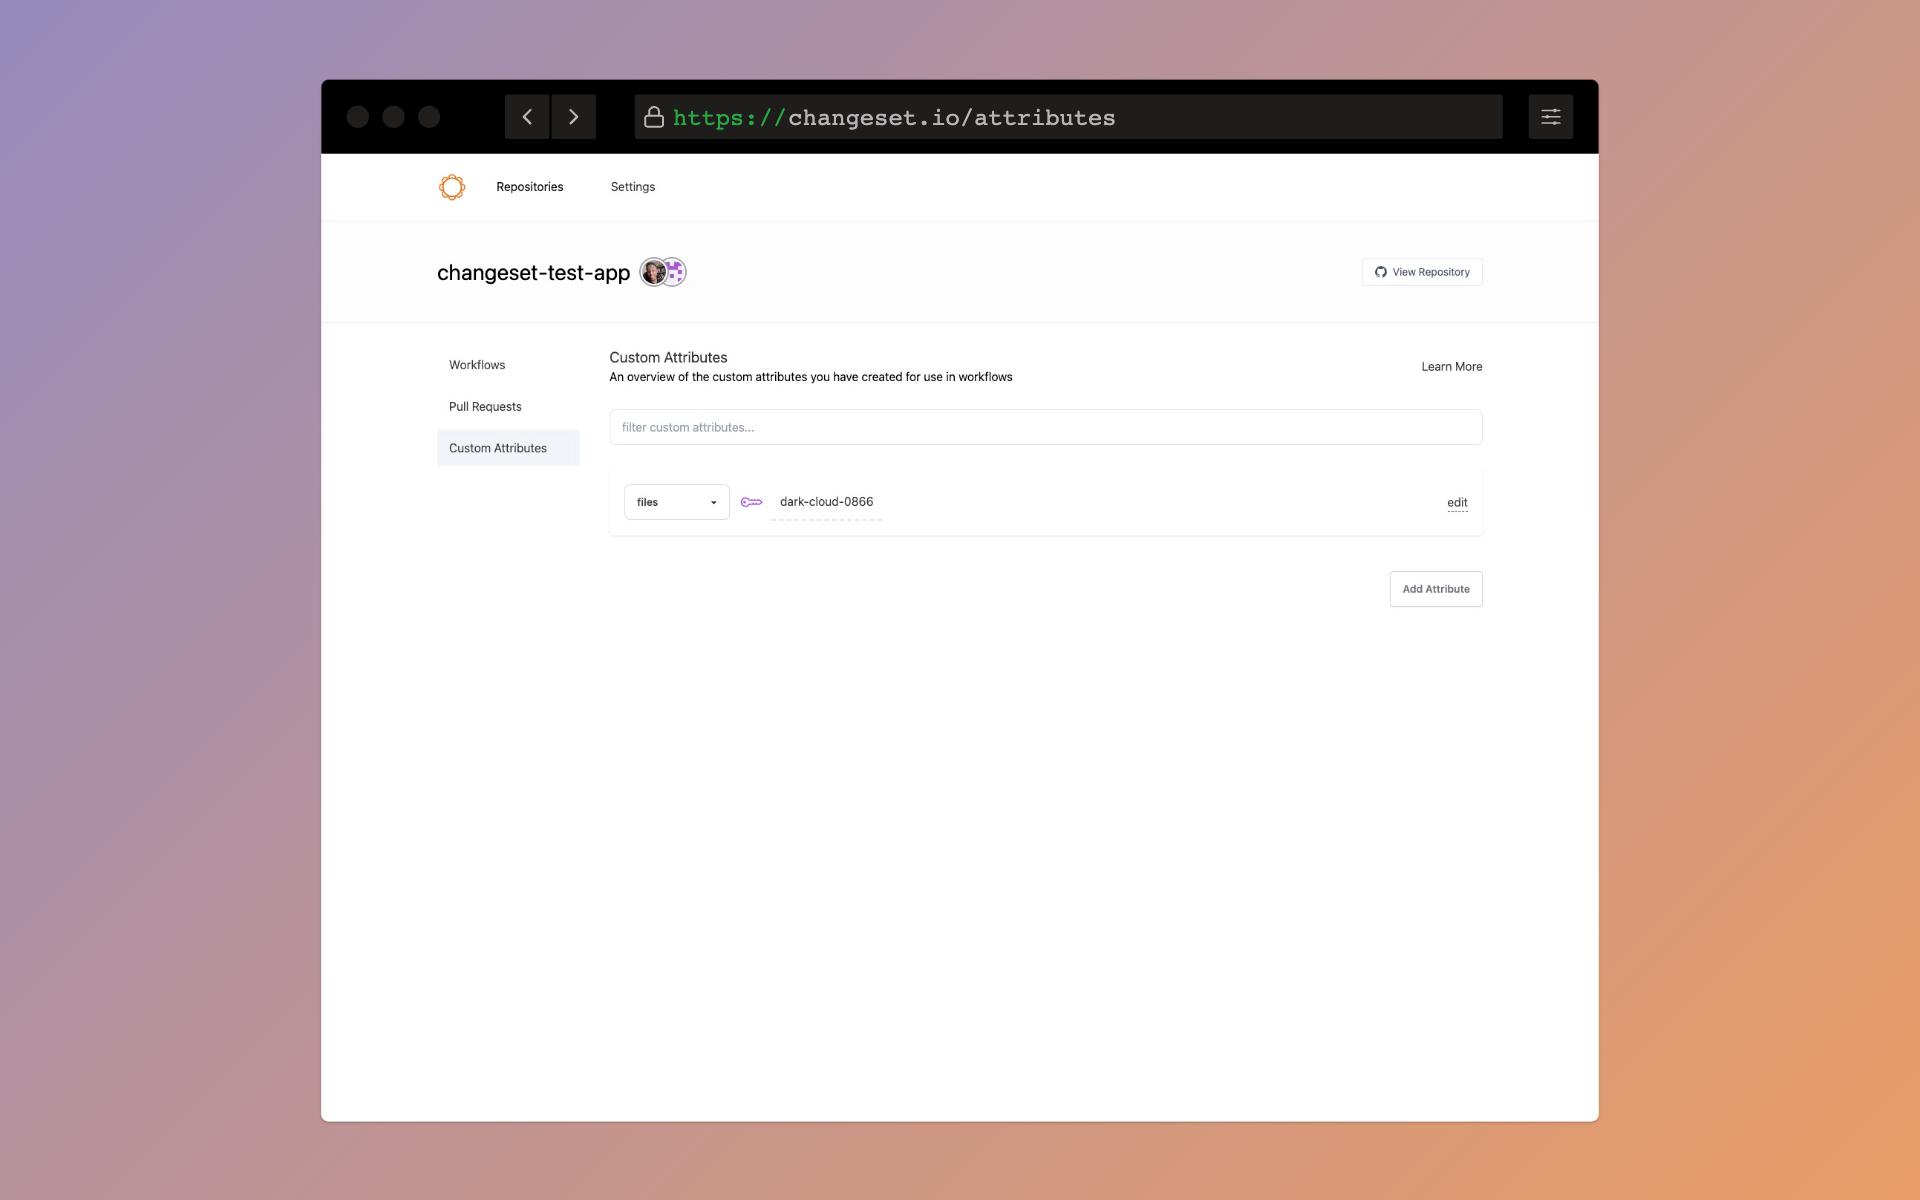
The key of the custom attribute is used when creating conditions, and starts as a randomized value. It can be updated to be more descriptive of the custom attribute.

You can click the underlined key, in this case "dark-cloud-0886", to customize the name of the attribute. Note that any spaces or special characters are removed from the key, and spaces are replaced with hyphens.

Note that "Files" is sellected in the attribute dropdown so that this custom attribute is derived from the list of files in the pull request.
Modifiers
Clicking "edit" will reveal the modifiers editor, and depending on which attribute you're looking at, the diffrent available filters and functions.
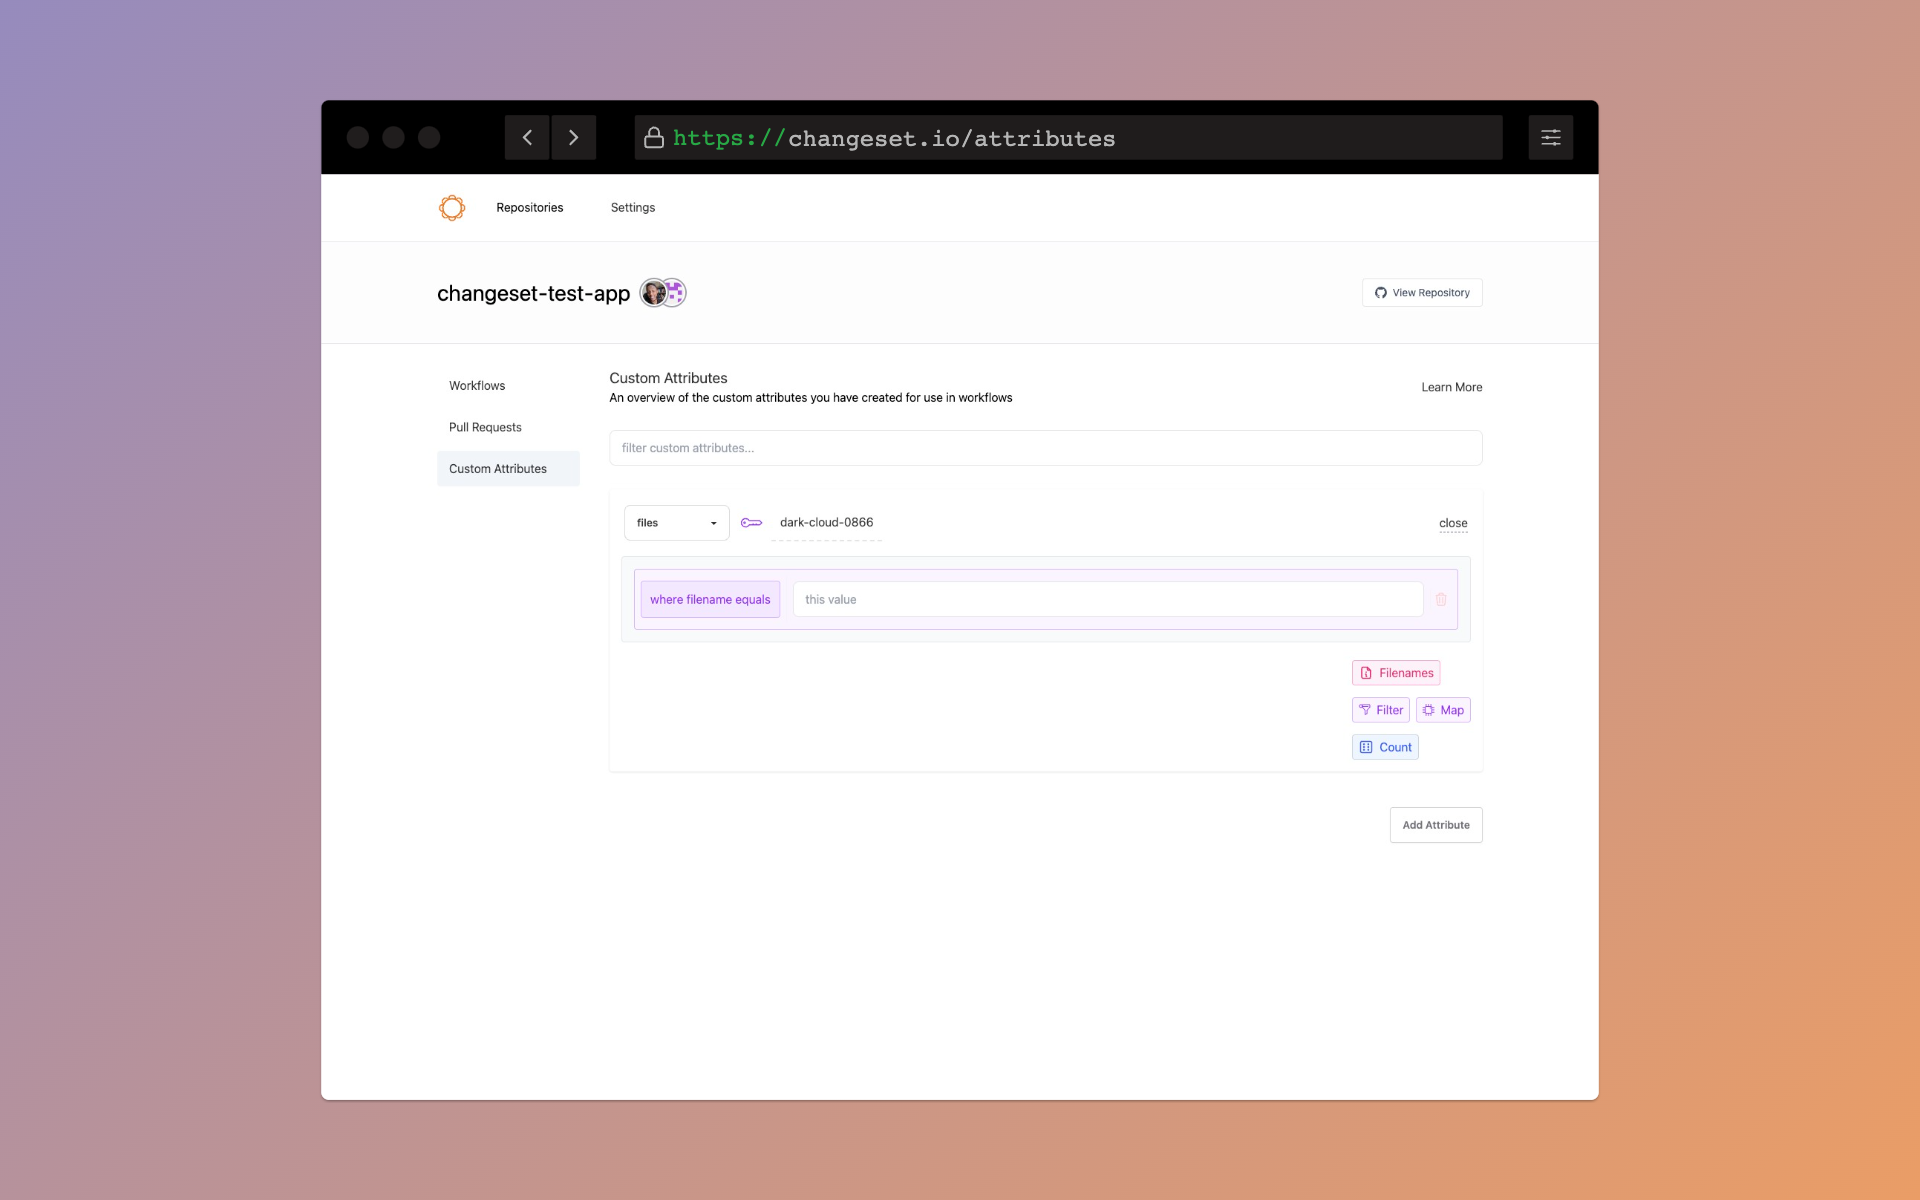
There is a default, empty-valued filter created by default. This default filter is looking for files by their filenames, and is using an "equals" operator.
Click "where filename equals" to display the filter editor modal.
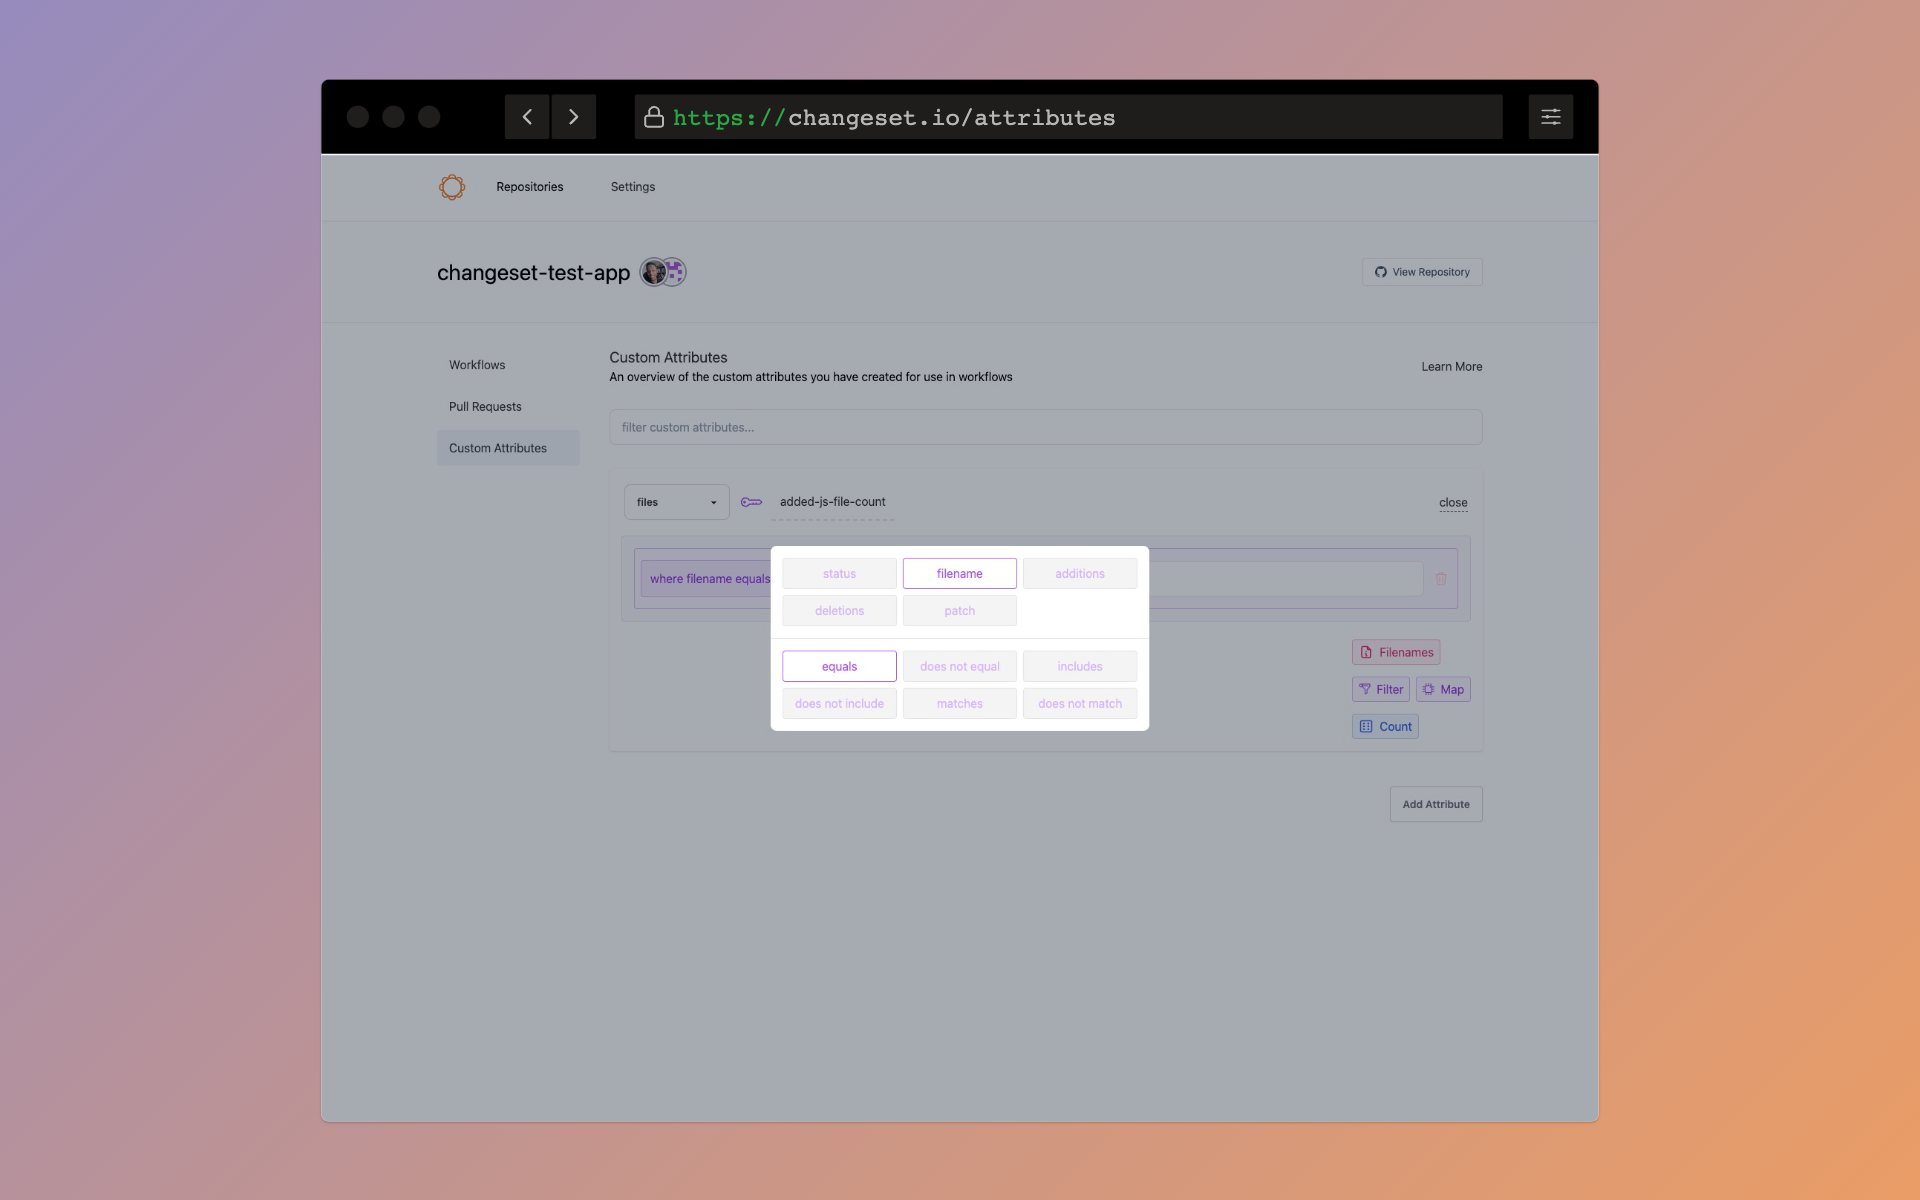
The upper portion of the modal shows the different attributes of a file available for filtering, and the lower portion shows the available operators for filtering.
Click "matches" to create a filter that runs a match operation against filenames.
Click outside of the modal to return to the filter, and note that it now shows "where filename matches"
For the value, input "*.js" to match against files that have a javascript extension
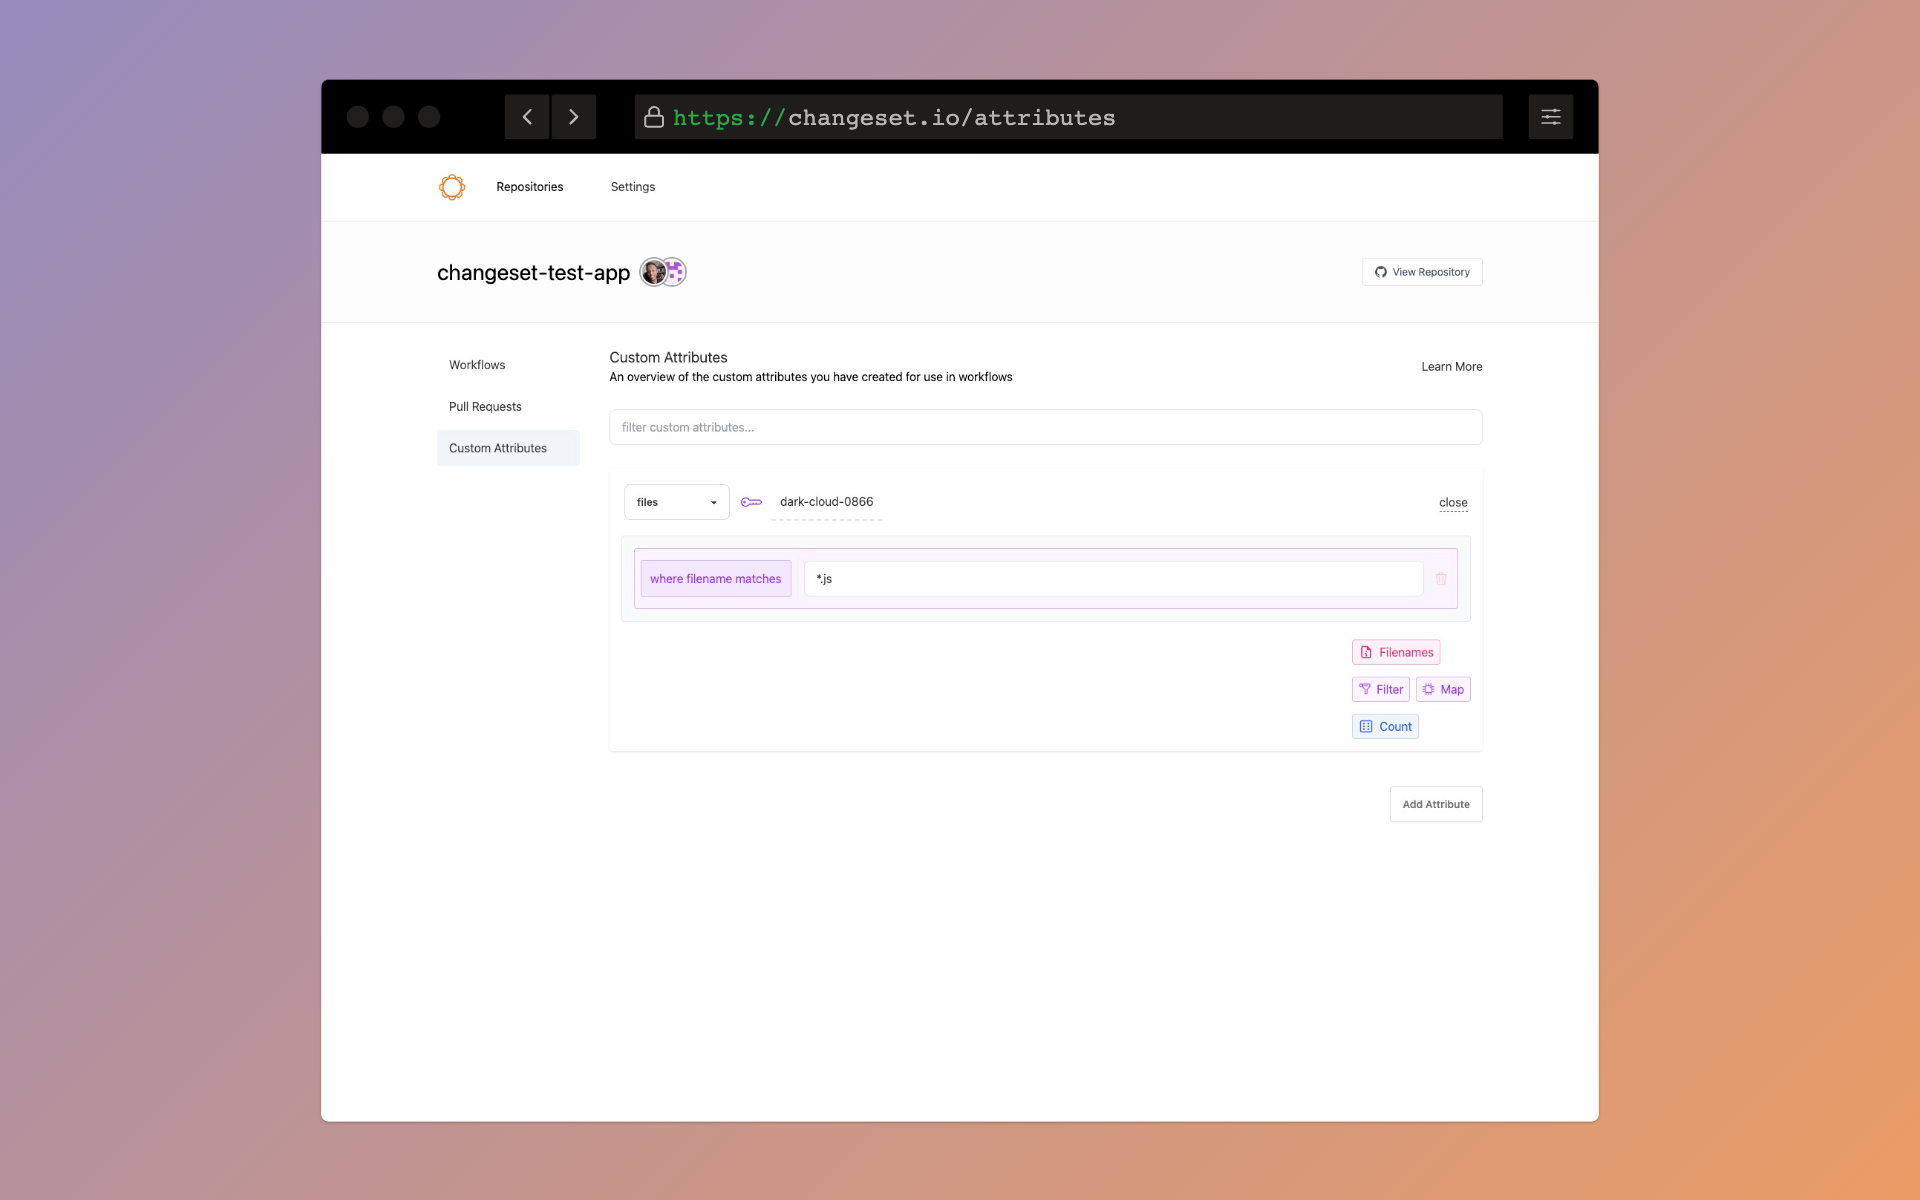
Next we'll want to filter the list down to only files where the status equals modified
Click the "Filter" button to add a new filter to the pipeline
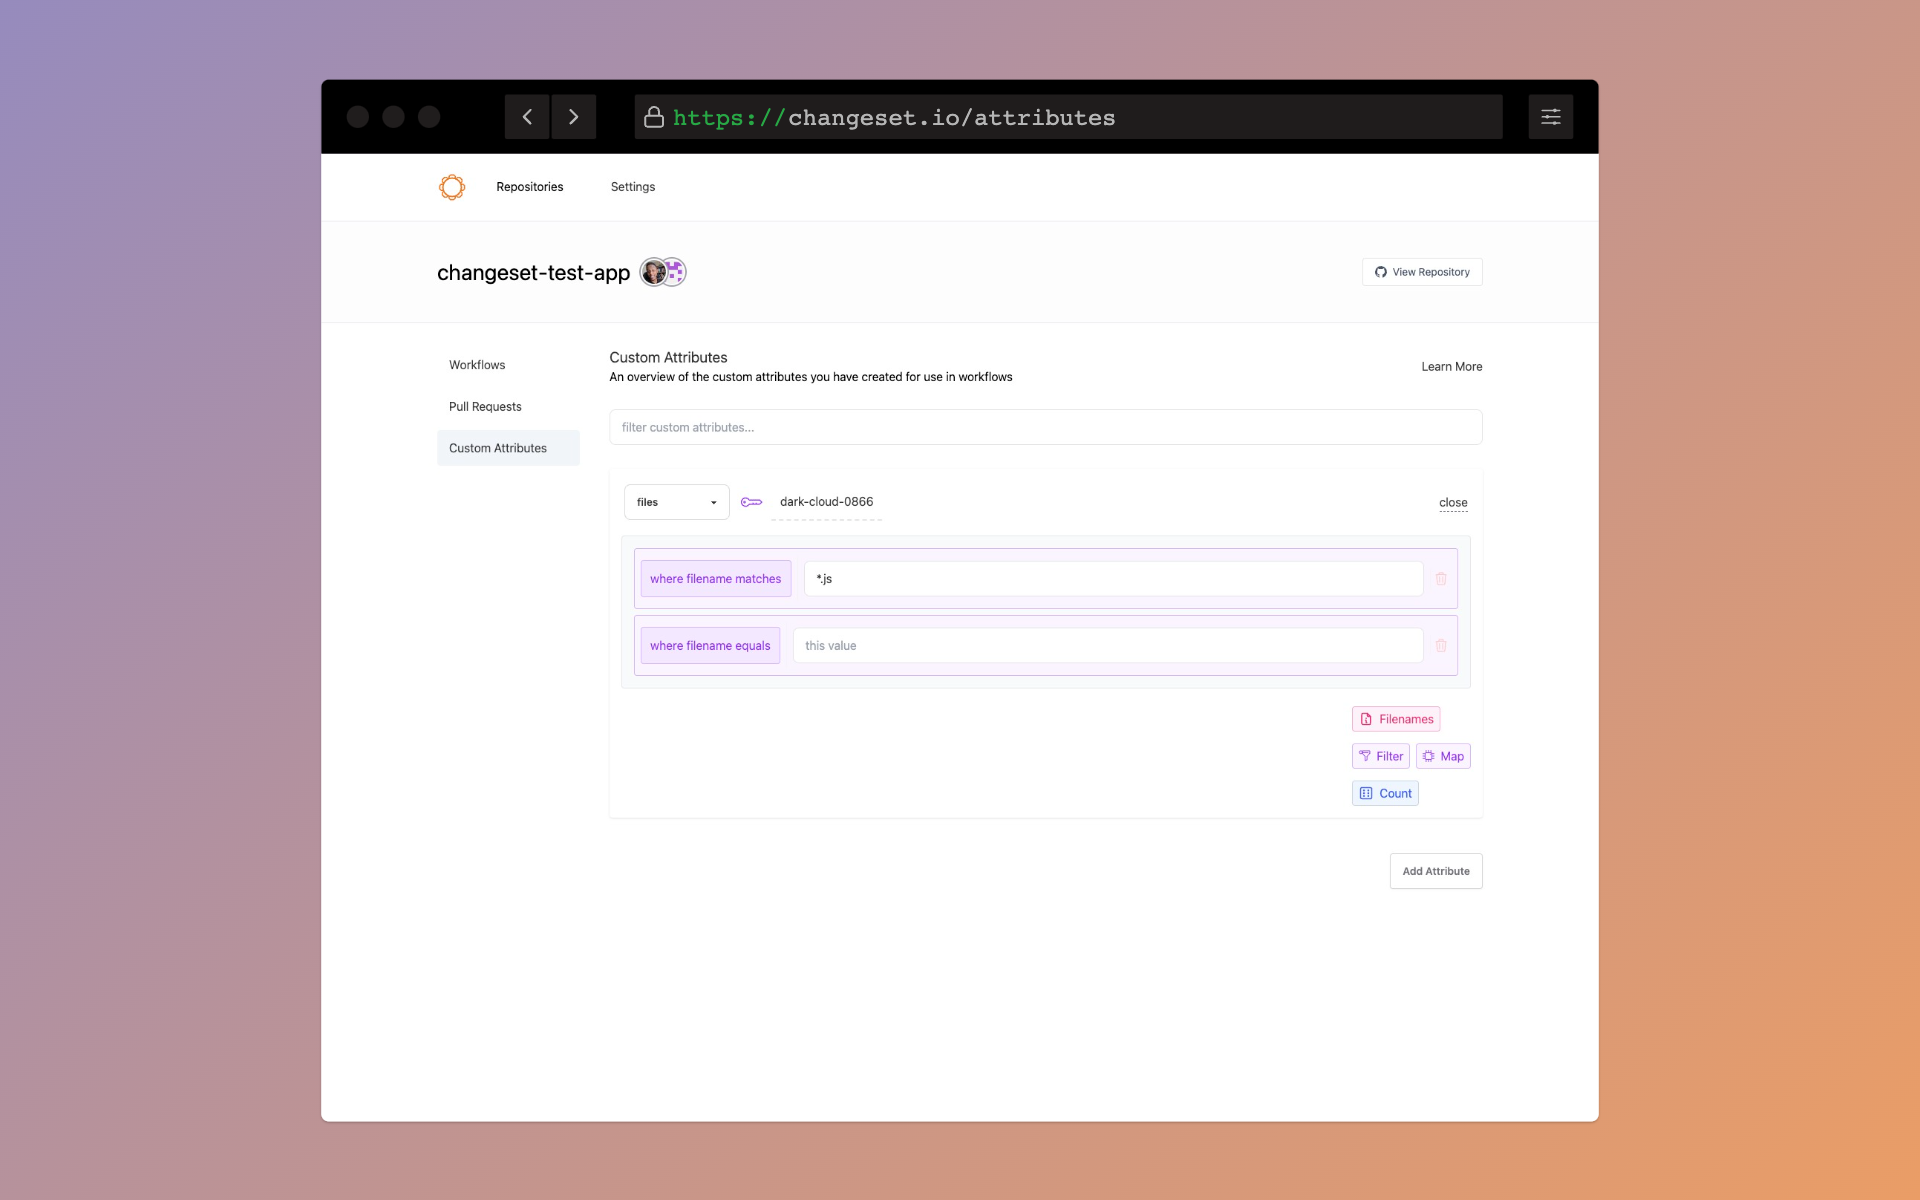
Click "where filename equals" to once again open the filter editor modal.
Select the "status" attribute button to create a filter that looks at files' statuses (added, modified, deleted)
Close the modal and set the "status" dropdown to "modified" so that the filter looks at only files that are modified
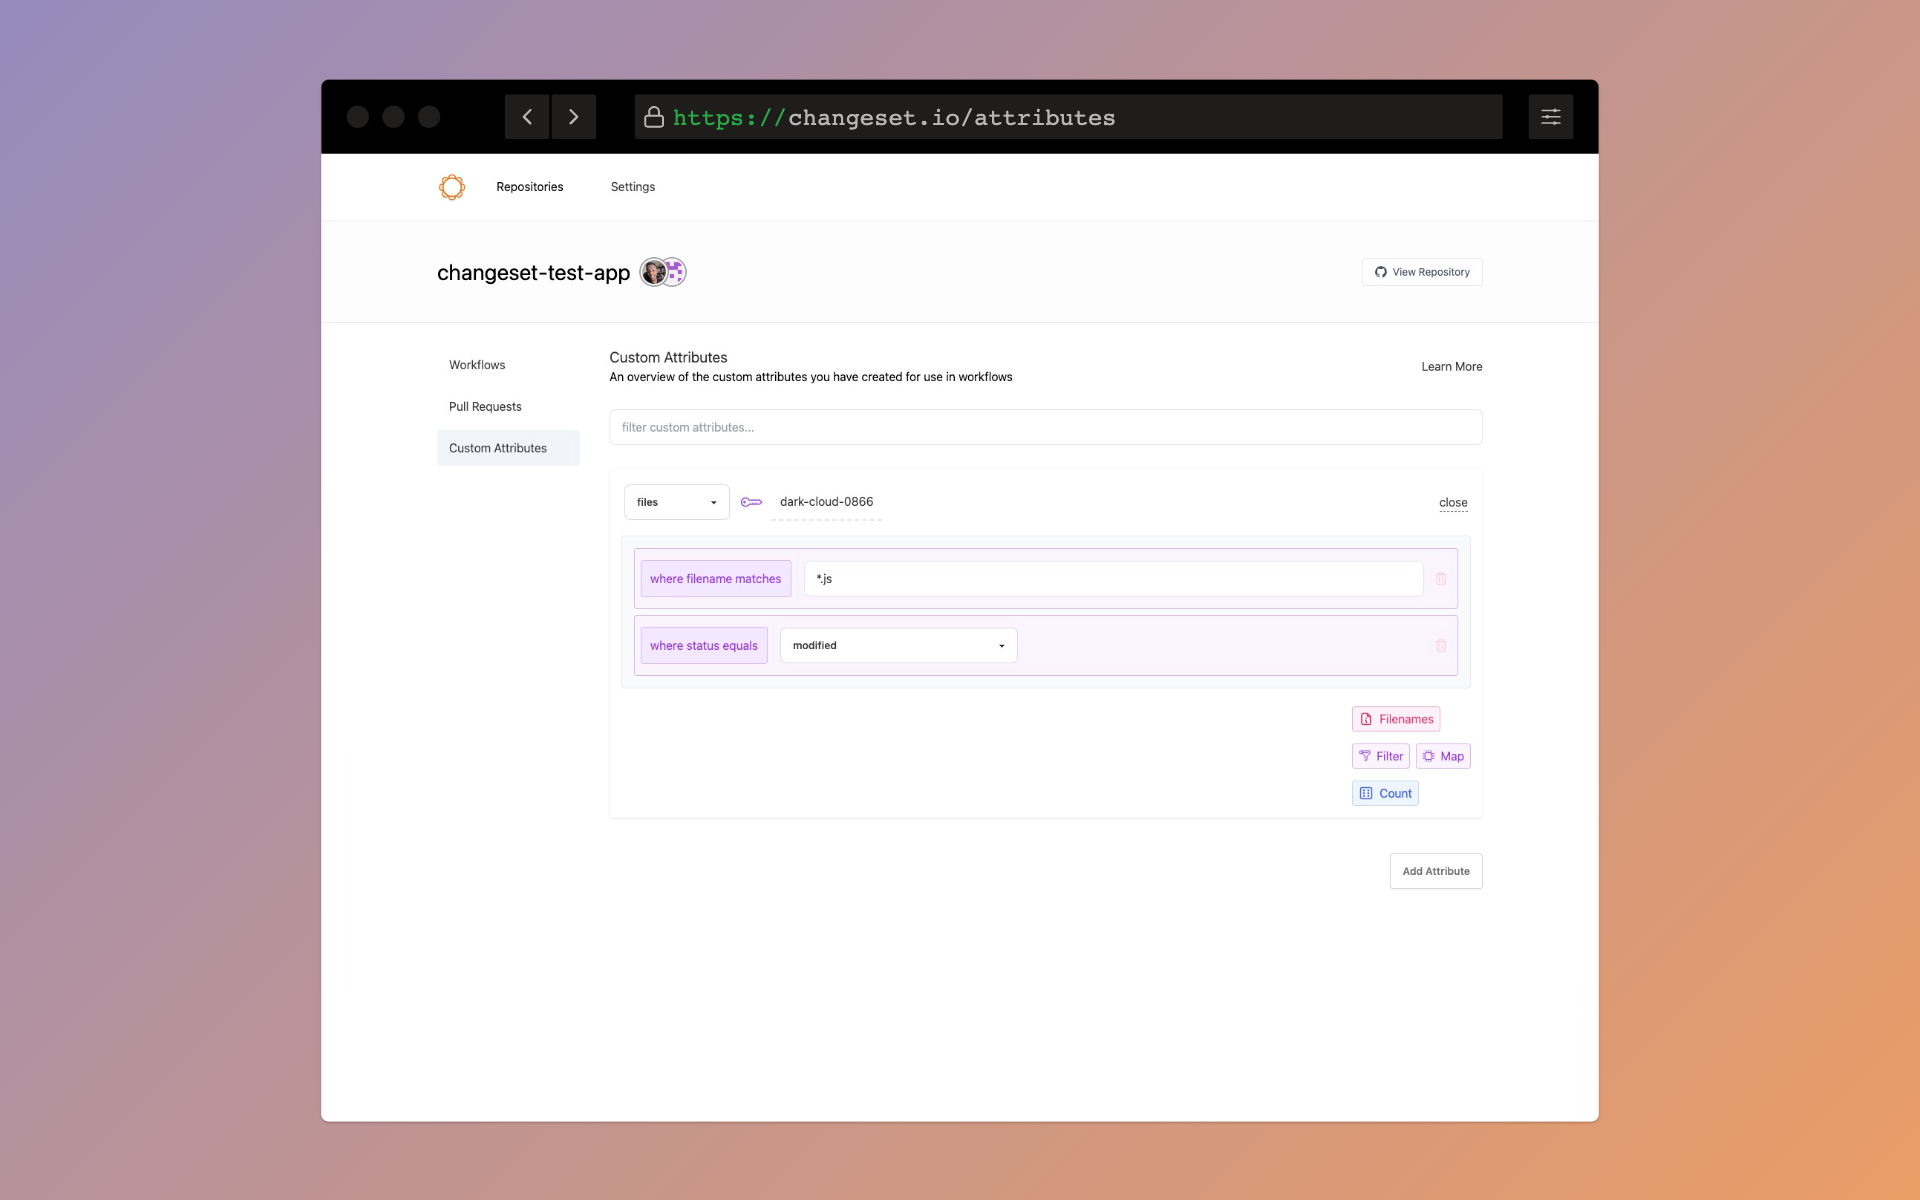
Click "Count" to apply the count function to the resulting list
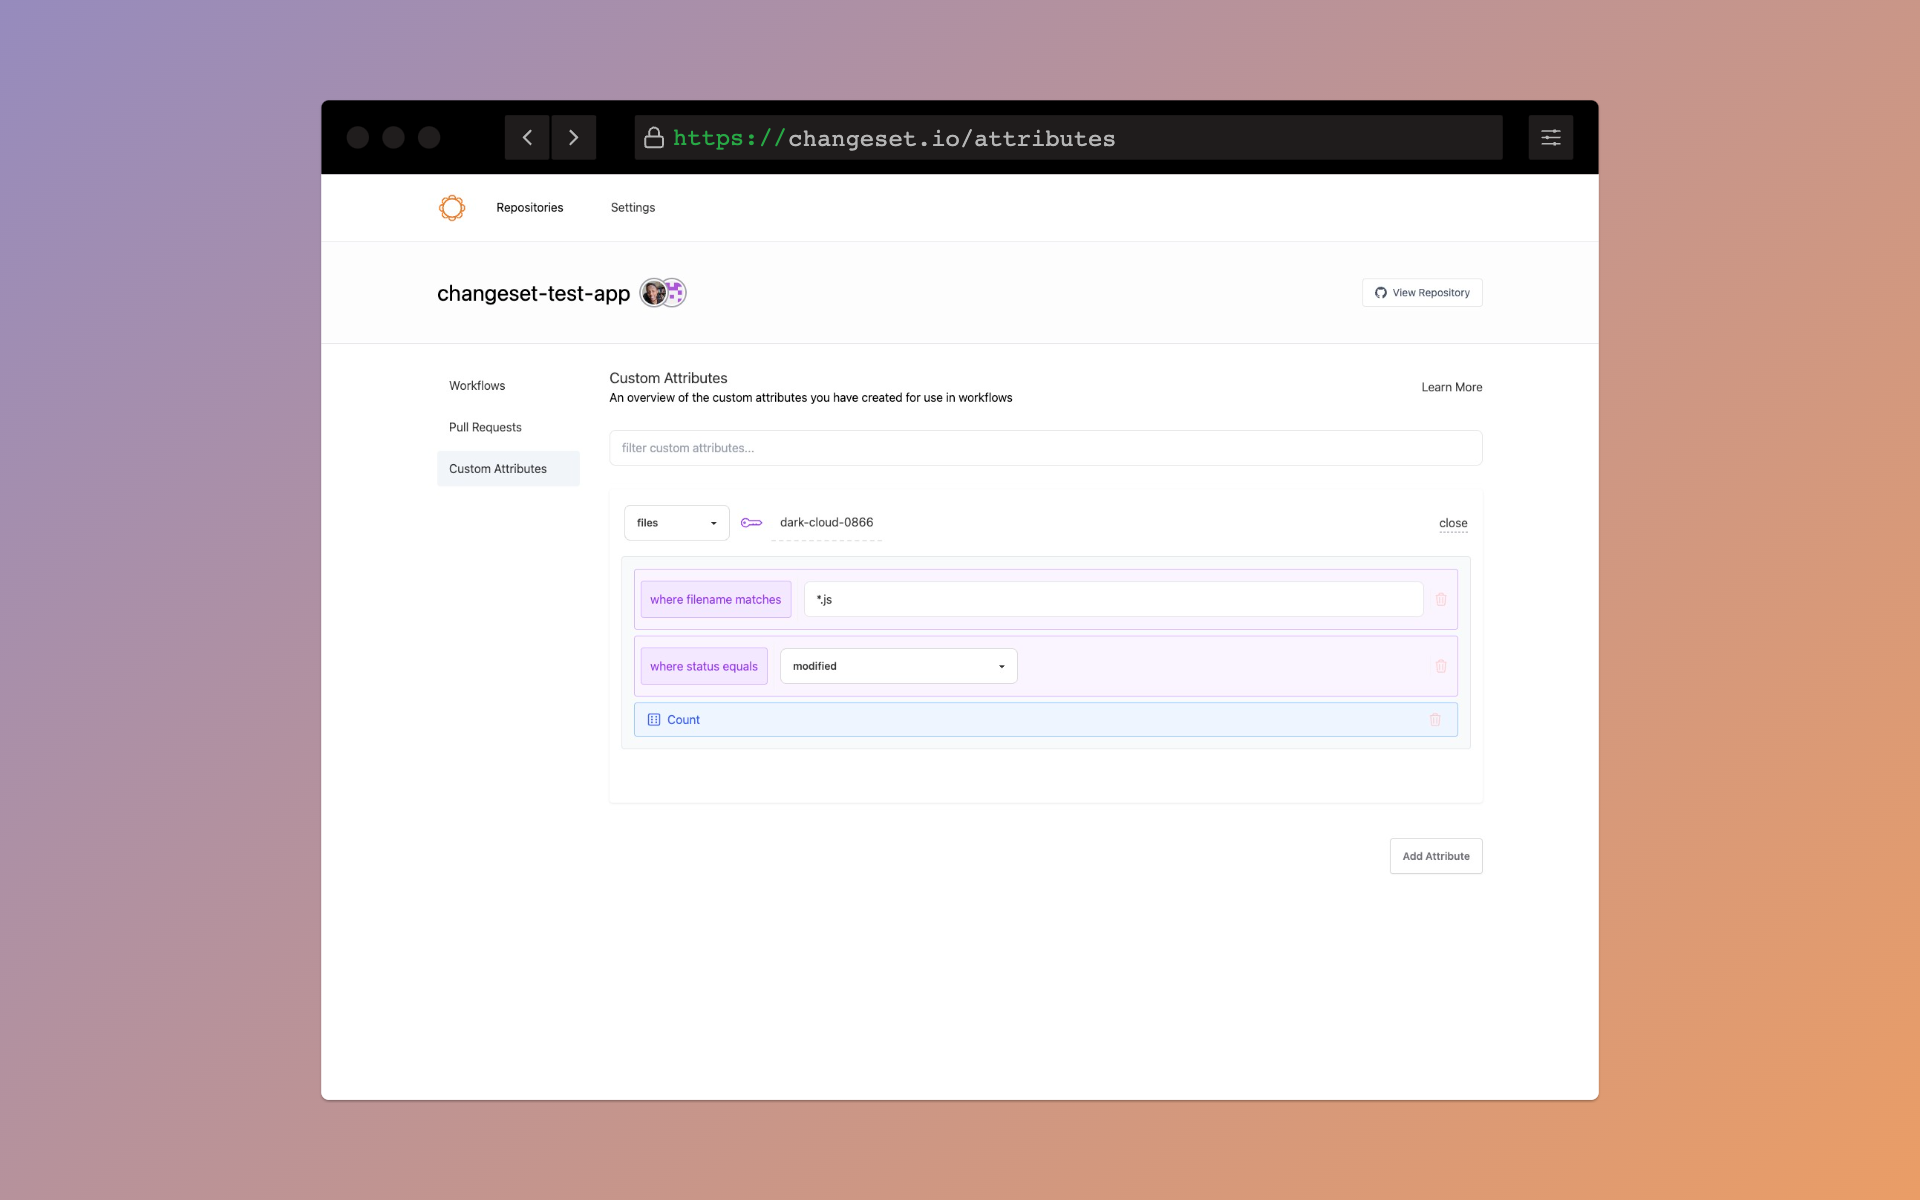
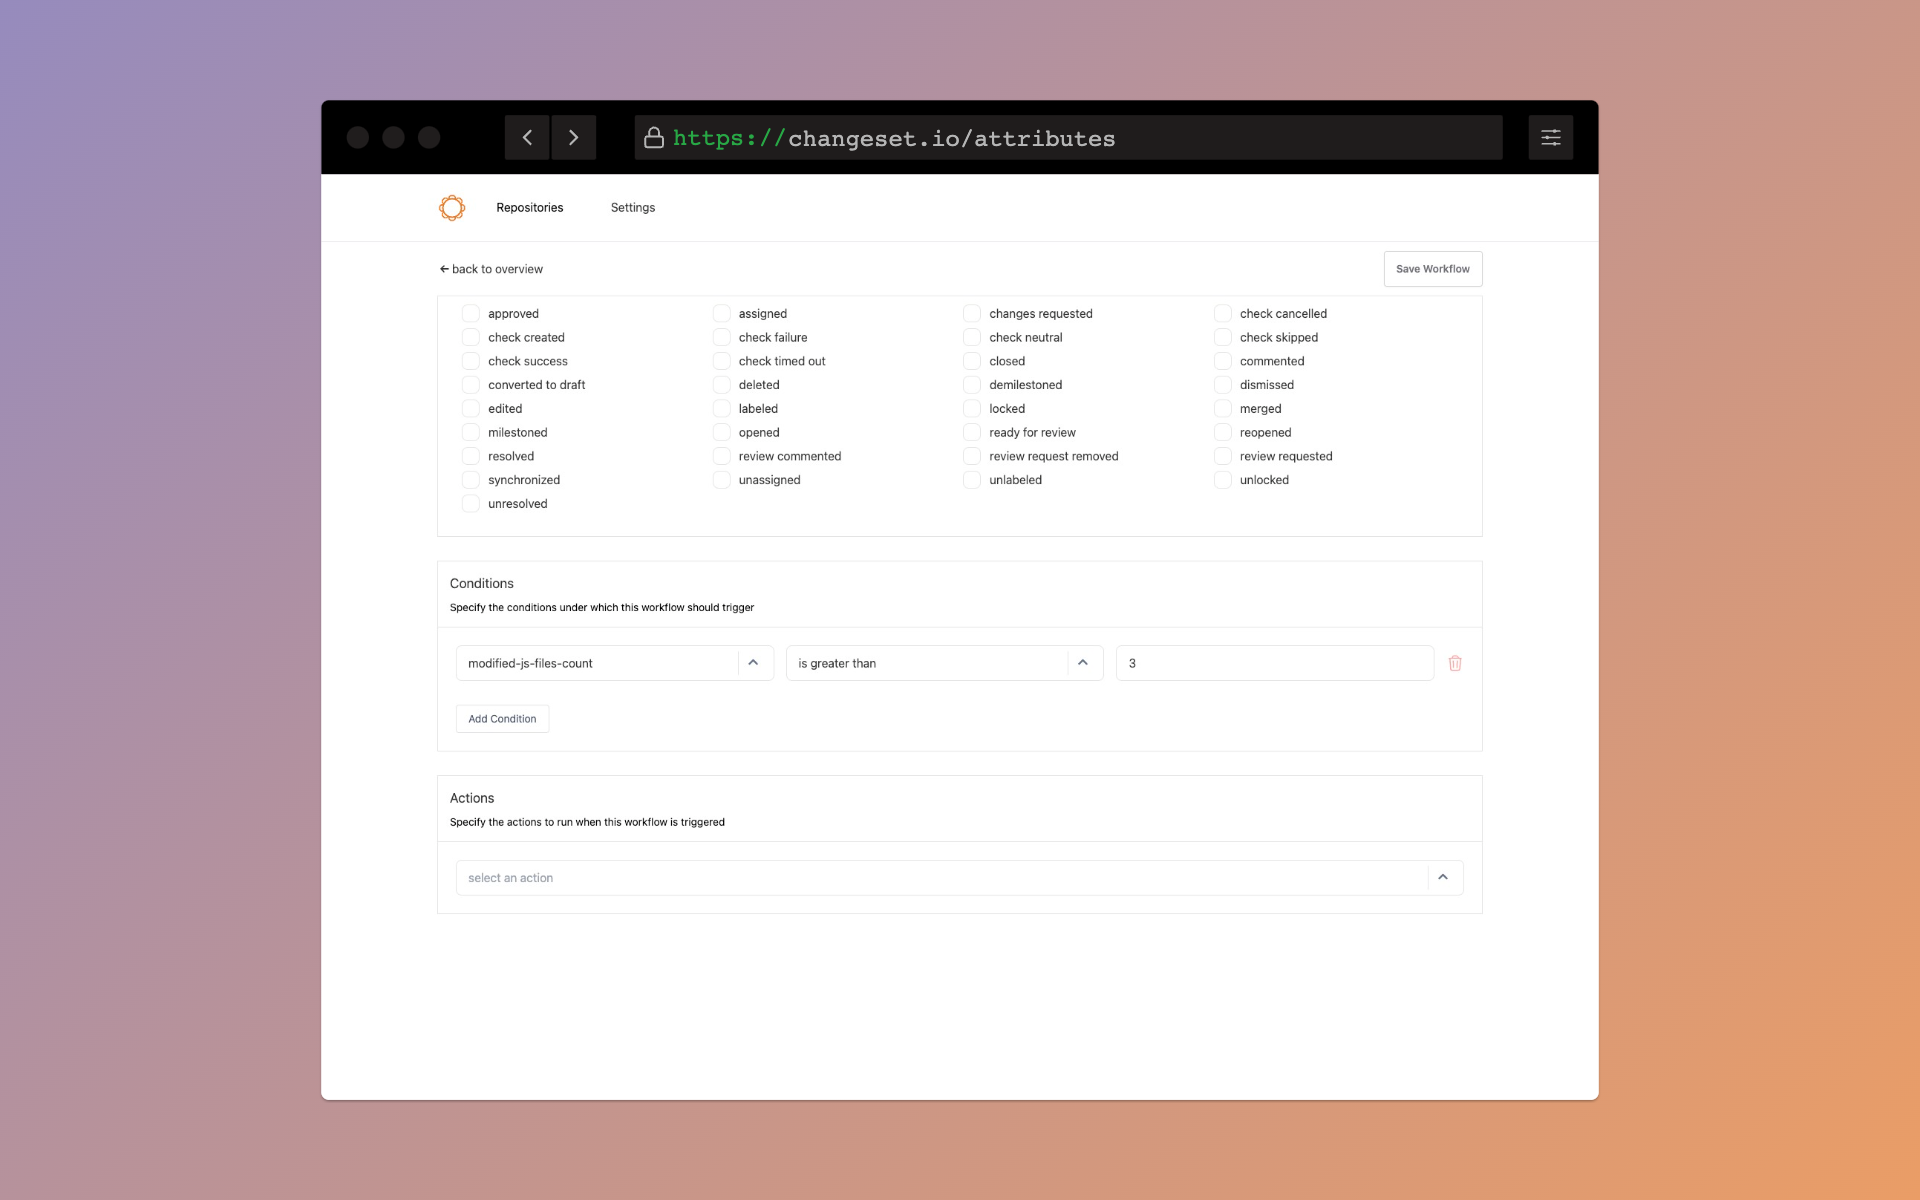
The custom attribute can now be referenced when creating conditions
Custom Attributes As Values
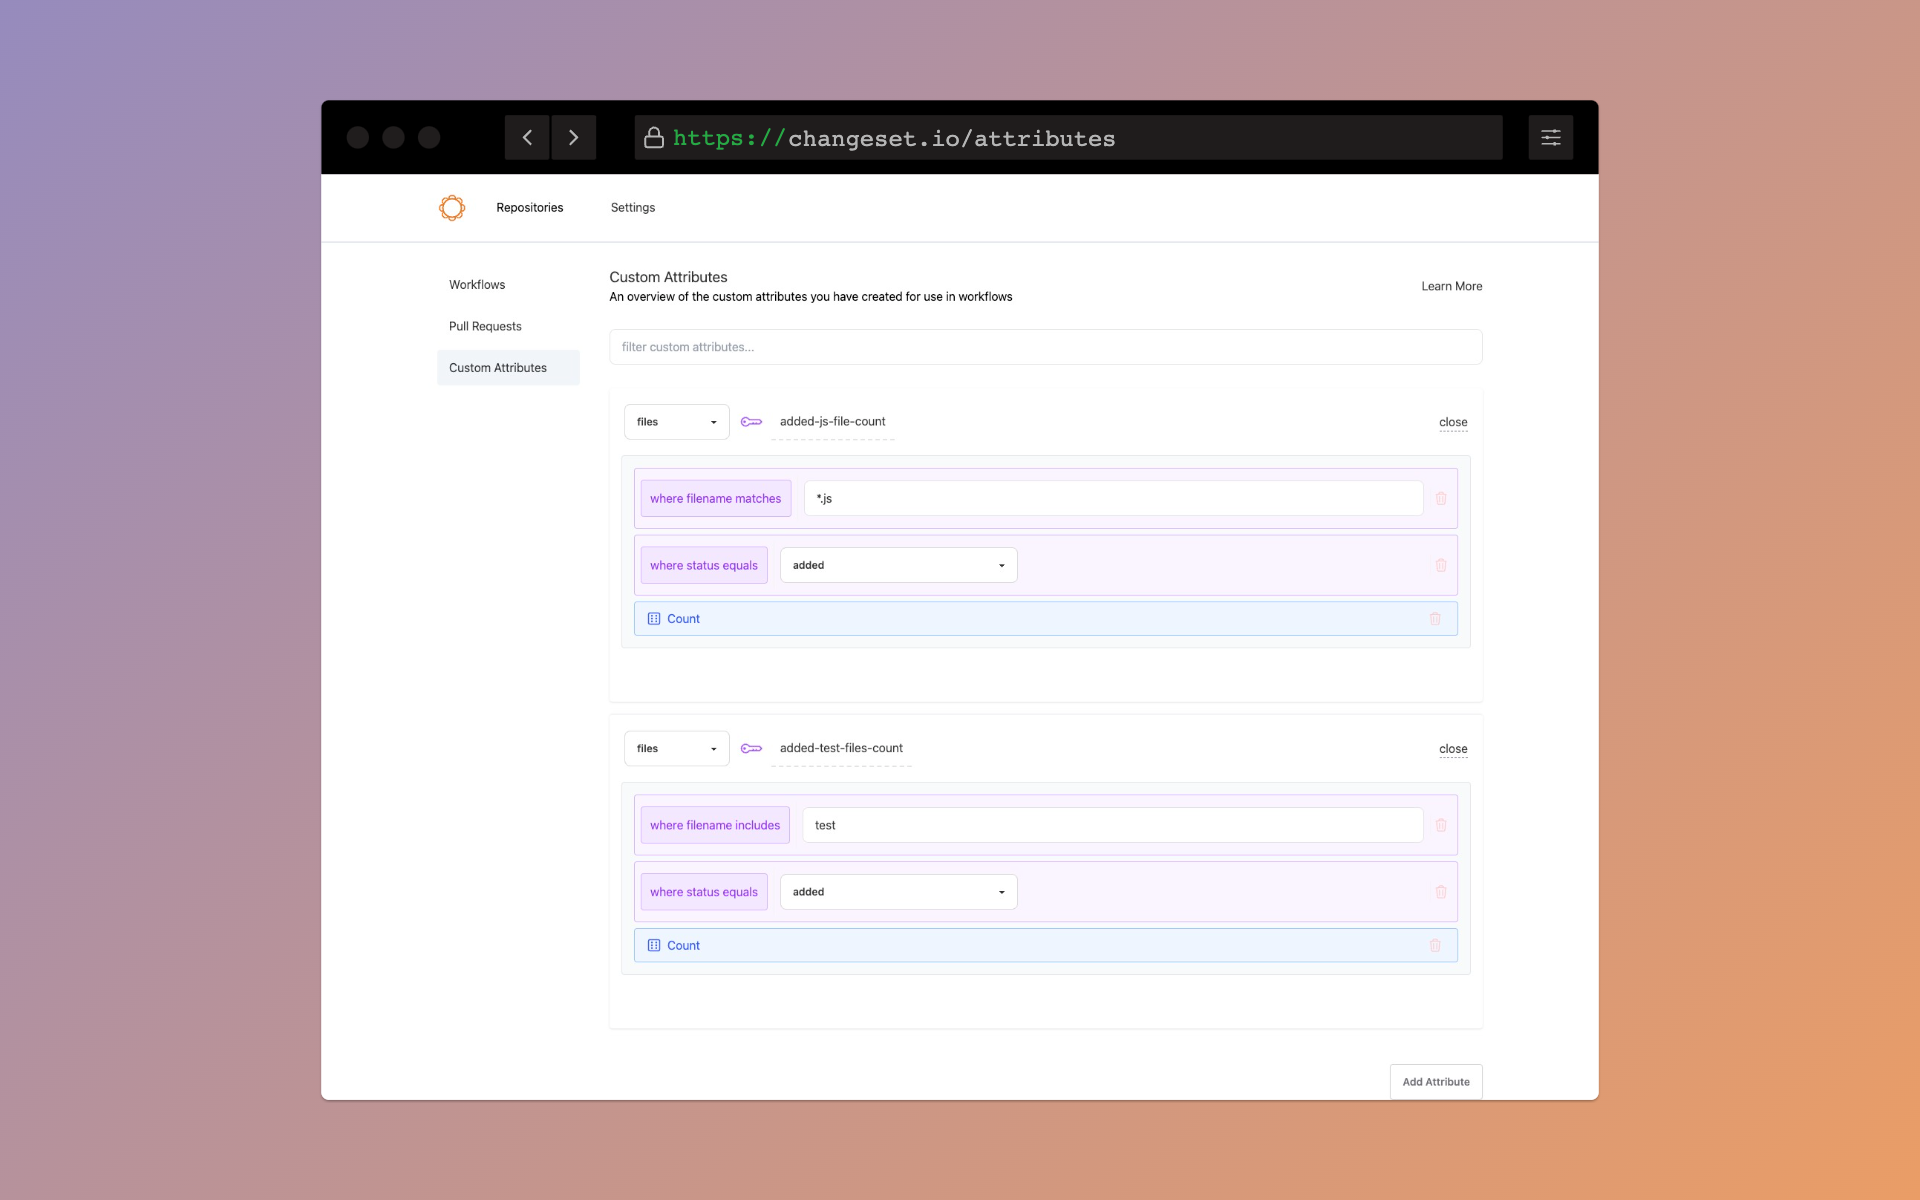
You can even use your custom attributes in the value input. For example, if you had two custom attributes; one representing the number of added javascript files, and one representing the number of added test files, you could compare them in a condition to make sure that a test was added with each file.
This is done using the special @@ attribute, along with the key of the custom attribute
The custom attributes might look like this
Using the @@ attribute to check if the values are equal, the condition would look like this:
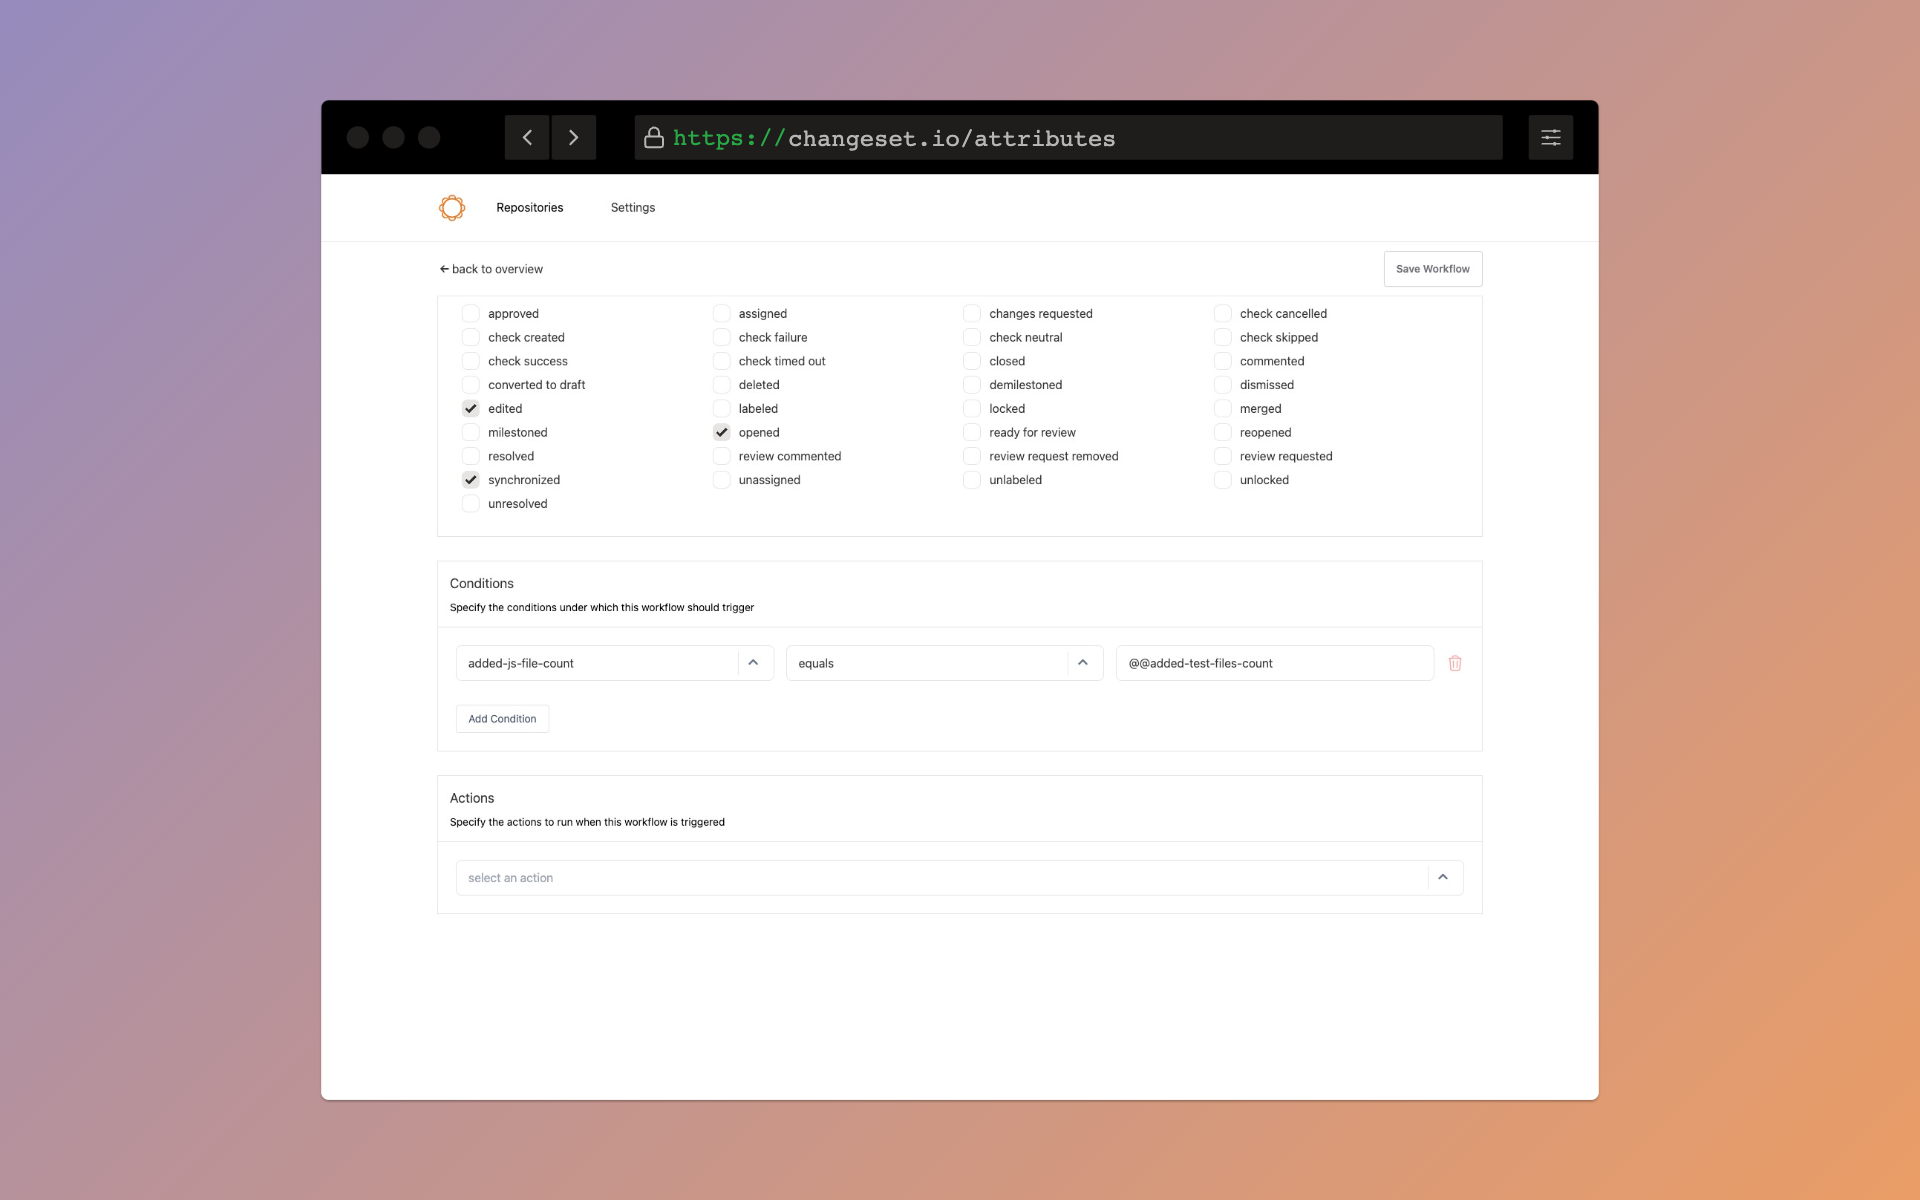
Note the use of the @@ before the key in the value input.
Nesting Conditions
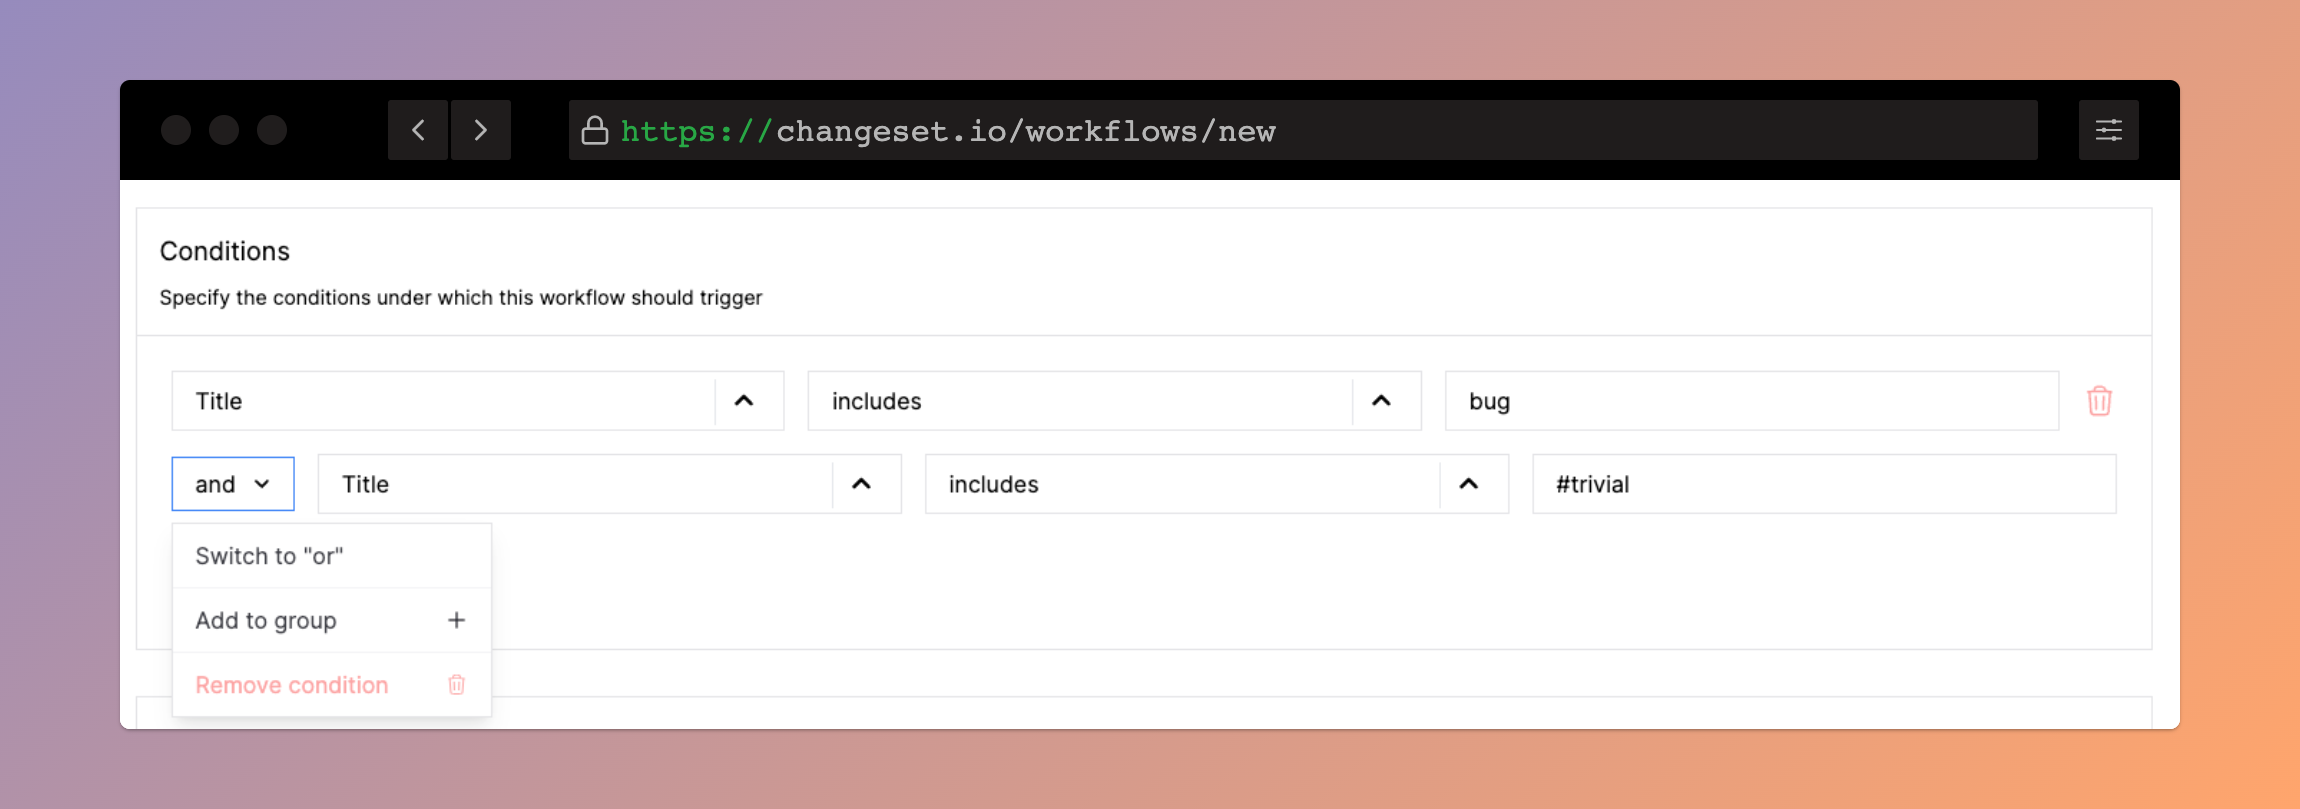
Sometimes a worflow requires a combination of conditions, and the workflow builder assumes an AND relationship between each condition added with the "Add Condition" button. For example, this setup would represent the following conditions:
- IF the title includes the word
bug - AND the title includes the word
#trivial

The "and" dropdown reveals options to change this condition to an OR condition, or to add the condition to a group.
When a group is created in a condition, all of the checks in the group act as a single logic check. For example, this setup would represent the following conditions:
- IF the title includes the word
bug - AND the title includes the word
#trivialOR the title includes the word#documentation
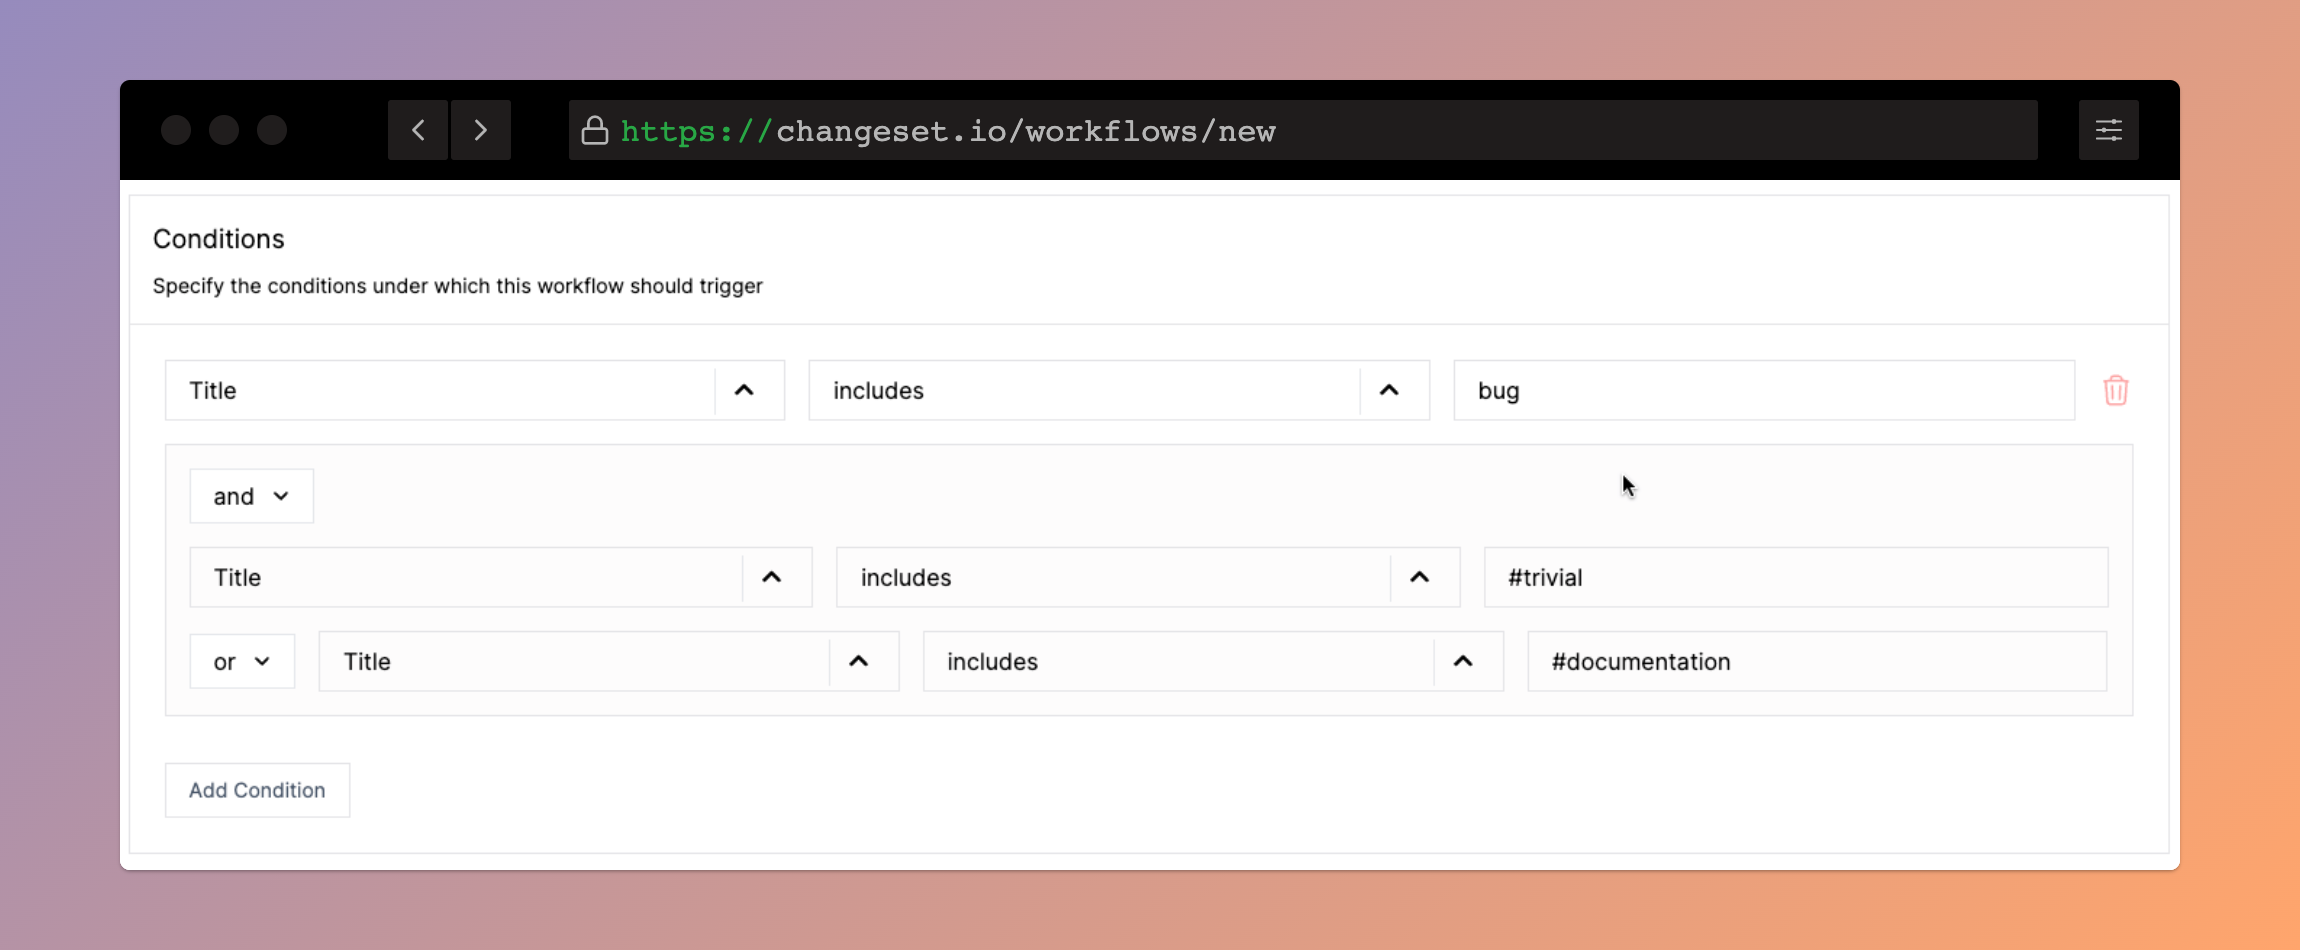
Groups are important when combining logic statements, otherwise the workflow will treat each statement as separate AND OR groups. In the previous example, if the AND and the OR weren't grouped, the workflow would infer them as grouped to the root condition, ie:
- IF the title includes the word
bugAND the title includes the word#trivial - OR the title includes the word
#documentation
Removing Conditions
Use the trash can icon to remove the root condition. To remove a grouped condition, select "Remove Condition" from the and/or dropdown.